A feature of the eMember Plugin allows admin to bulk update their member’s start date and membership level. This tool is useful if you have many members that need to have their accounts updated or changed.
The Bulk Update Admin Functions are useful if you intend to run an upgrade promotion on your website or need to cease a number of member accounts.
When you use these functions keep in mind the changes will apply to all the members that belong to the chosen membership level.

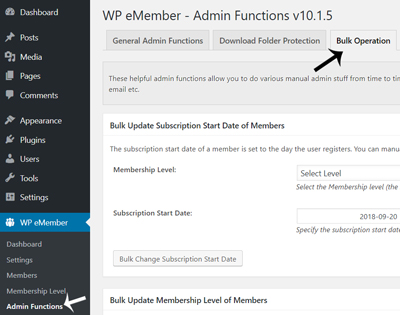
Locating the Bulk Update Tools
The bulk update tools can be found by:
- Clicking the Admin Functions menu under WP eMember.
- Selecting the Bulk Operation tab.
- Choosing which Bulk Operation function you would like to use (instructions of each tool can be found below).
Types of Bulk Operation Tools for the eMember Plugin
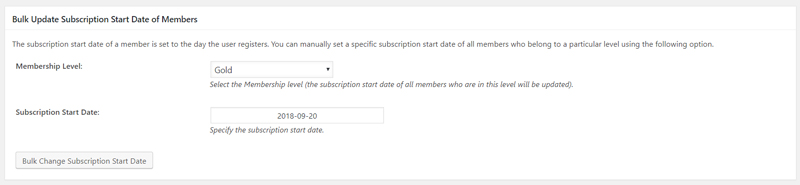
Bulk Update Subscription Start Date of Members
The subscription start date of a member is set to the day the user registers.
If for any reason you need to alter the date your user’s membership commenced, you can use this section to do so.
You can manually set a new subscription start date of all members who belong to a particular level with the click of a couple of buttons.
- Select the level that the members belong to.
- Choose the date that their membership should now commence. You may choose an earlier date if you wish to cease the members access, while choosing a later date will allow them further access to the site.
- Click the Bulk Change Subscription Start Date button.
- All members that belong to the level you chose from the drop-down menu will now have a new member start date. This new member start date will be visible in the member’s profile.
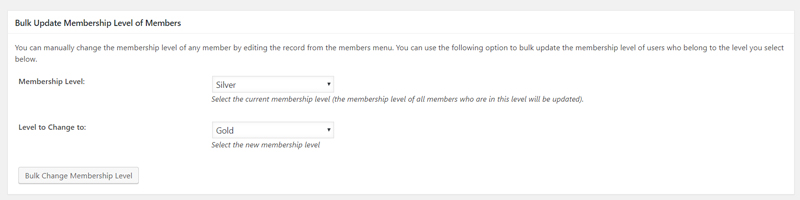
Bulk Update Membership Level of Members
You can manually change the membership level of any member by editing their record from the members menu. This is great if you only have a couple of members you wish to update.
If you find that you need to update all members within a specific level you can use the Bulk Update Member Level Tool.
For instance, you could be offering a deal where all members are upgraded free of charge. This bulk update option would allow you to make those changes in a couple of seconds.
- Select the current membership level of the members that you wish to update. Note that all members within this level will be updated.
- Select which level these members will be updated to. This may be an upgrade or downgrade depending on the circumstances.
- Click the Bulk Change Membership Level button.
- All the members from the chosen level will now be updated to the new level.
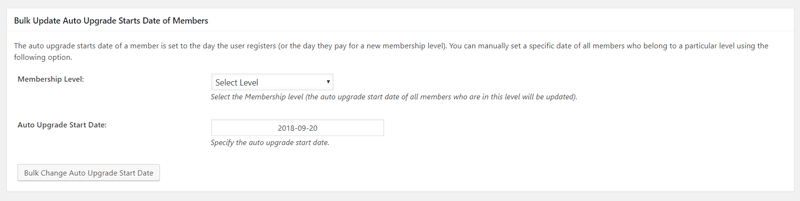
Bulk Update Auto Upgrade Starts Date of Members
The auto upgrade starts date of a member is set to the day the user registers (or the day they pay for a new membership level). You can manually set a specific date of all members who belong to a particular level using the following option.
- Select the level of the members that you wish to change the auto upgrade start date of.
- Enter the new auto upgrade start date for the members.
- Click the Bulk Change Auto Upgrade Start Date button.
- The members that belong to the chosen level will now have a new auto upgrade start date.
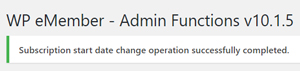
A Successful Bulk Update
Once you complete a bulk member update, if the process has been successful you will receive a message at the top of the screen similar to the one below.
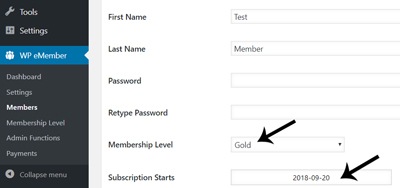
In the case of this example, all members of the Gold level had their subscription start date updated to the 20th of September 2018. This is now reflected in the profile of each of the Gold members (displayed in the screenshot below).