With our Payment Gateway Bundle addon you can add more payment gateway options to your store in addition to the core payment gateways offered in the WP eStore plugin. This includes processing both on-site and off-site payments.
You may already be familiar with an off-site checkout where the payment is collected on a secure page on the payment gateway’s site. However, In an on-site checkout scenario, the user never leaves your site and the payment is processed via credit card on a secure page on your site (a SSL certificate is required for the page that will take the user’s credit card).
How the Checkout Flow Works
Depending on the type of checkout option a payment gateway offers, the checkout flow in our payment gateway bundle will vary.
If you are accepting payments with a gateway like Stripe or PayPal Pro then here is how it will work:
Step 1) The customer adds item(s) to the shopping cart by clicking the add to cart buttons of your products. The item(s) will appear in the shopping cart.
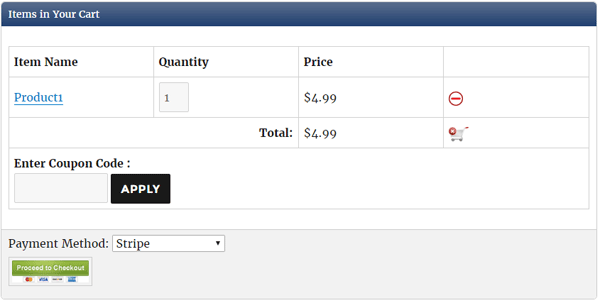
Step 2) The customer clicks the checkout button in the cart.
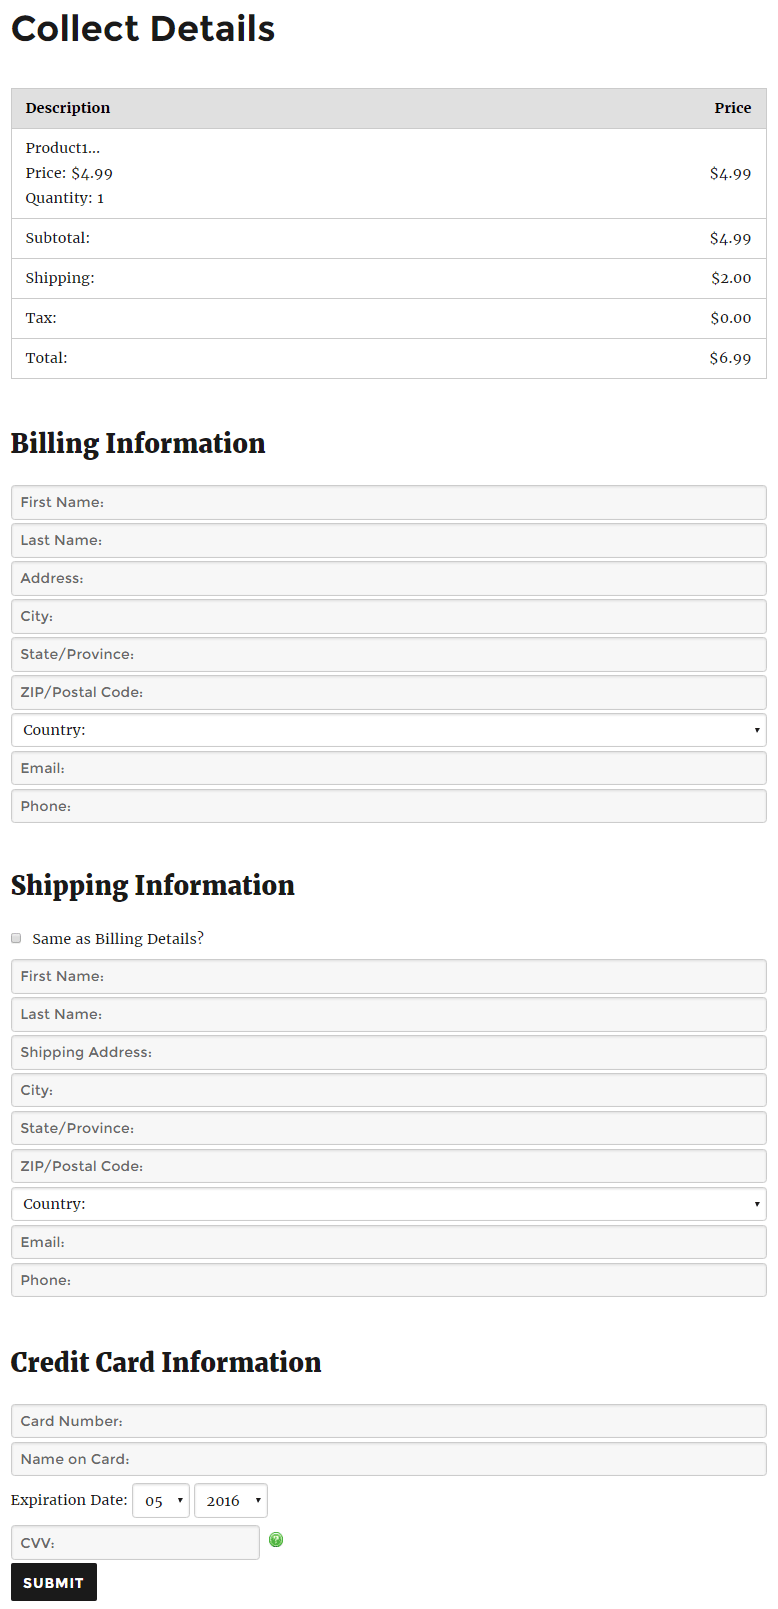
Since Stripe requires the payment to be processed on-site, the user will be redirected to a page on your site called “Collect Details” when the “Proceed to Checkout” button is clicked. You can edit the title of the “Collect Details” page to anything you want by editing the page in WordPress page editor. Don’t change the URL of the page though.
Step 3) Once the customer lands on the “Collect Details” page, he will need to enter some details to complete the checkout.
If all the items in the shopping cart are digital items then no shipping information will be collected from the user on this page. However, If there is one or more physical product in the cart, a shipping block will also appear in addition to the Billing and Credit Card details fields.
The screenshot below shows you how the “collect details” page looks like.
Step 4) When the “Submit” button is clicked, the payment will be processed in the backend and upon completion, the user will receive a success message.
Step 5) The plugin will complete the post payment processing tasks and send a notification email to the customers (and the admin).
Optionally, you can create and configure a Thank You page on your site (where the customers will be redirected to after the payment).
Note: We provide technical support for our premium plugins via our customer only support forum