Tips and Tricks WP eCommerce

eCommerce Solution for WordPress Blog

  • Home
  • eCommerce Plugins
  • WP eStore Documentation
  • WP Shopping Cart Doc

Simple Shopping Cart Creating a Specific Checkout Page

The Simple Shopping Cart Plugin has cart shortcodes that you can use anywhere on your site to show the shopping cart (the customers can directly checkout from there). So you don’t really need a specific checkout page.

However, if you want to create a specific/separate checkout page then you can do that too.

A specific checkout page can be useful for the following:

  • Add checkout/payment related messages to give more guidance to your customers
  • Show/offer some upsell products on your checkout page

Creating a Specific Checkout Page for Simple Cart

Step 1) Create a WordPress page called “Checkout” from the pages menu of your site (You can give this page any title you want).

Step 2) Add the simple shopping cart shortcode on this page:

[show_wp_shopping_cart]

or the following:

[always_show_wp_shopping_cart]

Step 3) Go to the simple cart settings menu and specify the URL of this checkout page that you just created in the ” Checkout Page URL” field.

Step 4) Add a link to your checkout page in your navigation menu or the sidebar (so customers can click that link to go to the checkout page).

Optionally, You Can Do the Following Too

The following steps are optional so use them if you think it will be useful for you.

Step 5) Enable the “Automatic redirection to checkout page” option from the settings menu of the plugin. That will auto redirect the customers to the checkout page when they add an item to the cart.

Step 6) Add any special messages or up-sell product offers on your checkout page.

Step 7) Use the compact shopping cart shortcode on your sidebar so customers can view a summary of the items in the cart.
WP eStore Manual Checkout Form Builder AddOn

General Description

The eStore Manual Checkout Form Builder Addon is a plugin which allows you to customize the manual/offline checkout form.

The user can add new form fields or control how the form will be displayed using this addon.

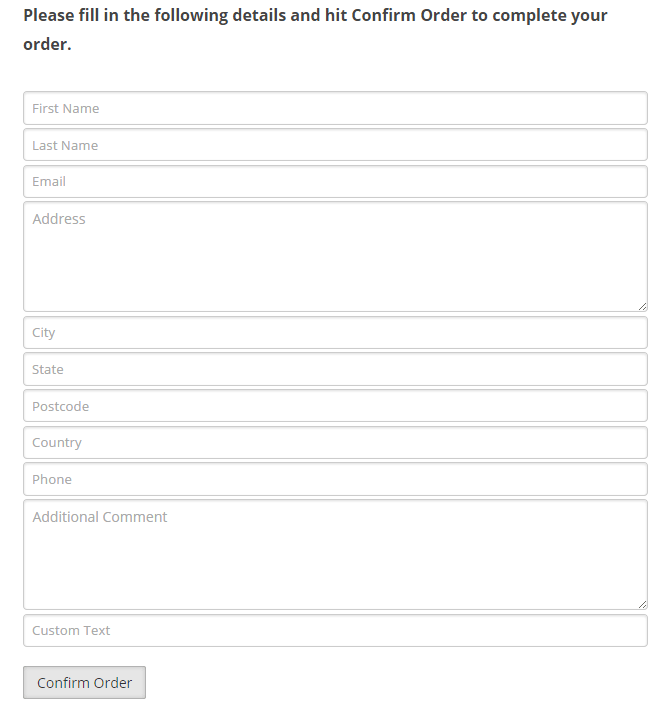
See example screenshot below:

screenshot of manual form using estore checkout form builder addon


Using the eStore Manual Checkout Form Builder Addon

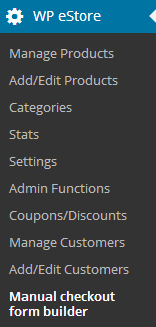
1. Once you have installed the addon it will appear in the eStore plugin menu

screenshot of checkout form builder addon menu in the estore settings

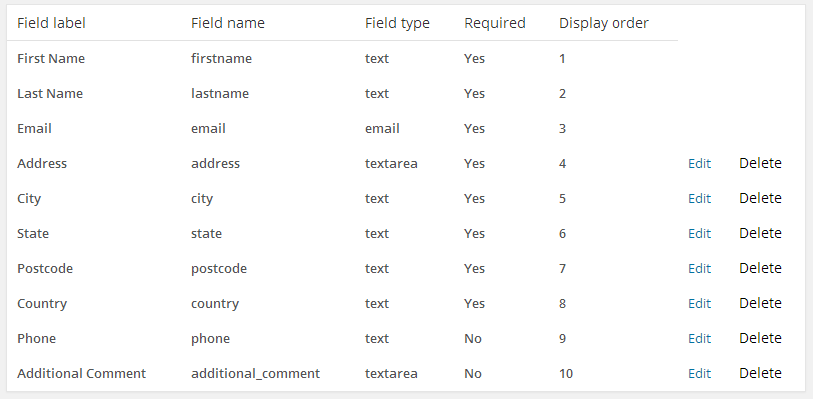
2. The addon automatically configures all the default form elements during activation.

screenshot of estore checkout form builder addon settings

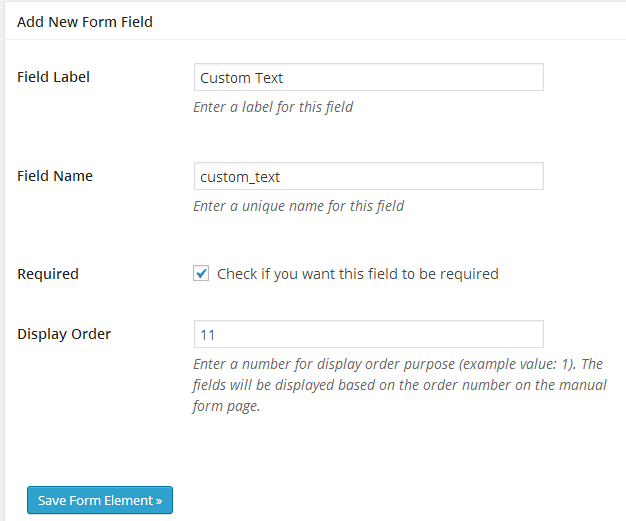
3. To add a new form element enter the following and click the “Save Form Element” button.

a) Field label: The text for the input field

b) Field Name: The name of the input field (it needs to be unique)

c) Required: Check this option if you want to make this field required

d) Display Order: The order in which this field will be rendered (example: 11).

screenshot of how a new form element can be created in the estore checkout form builder addon

Get the Manual Checkout Form Builder Addon

The price of this addon plugin is $29.95

Your Shopping Cart

Shopping Cart Empty
Shopping Cart is Empty
Visit The Shop

Search

Featured Documents

Stylish Product Display Options for WP eStore WP eStore Quick Setup and Usage Video Tutorial WP eStore Shortcodes and Functions Reference WordPress eStore Plugin Features WordPress eStore Plugin Demo What Our Customers Have to Say About Our Products WordPress eStore WishList (Feature Suggestions) WordPress eStore Frequently Asked Questions (FAQ) How to Show Add to Cart buttons

Featured Plugins

WP Express Checkout Plugin
wordpress_estore_icon
wordpress membership plugin icon
wordpress_affiliate_plugin_icon

Copyright © 2025 | eCommerce Plugins