This guide will get you up and running with the WordPress eStore plugin and selling your first product in just a few minutes. By the end, you’ll have:
- The plugin installed and activated
- Your checkout (PayPal) configured
- Your first product created
- An “Add to Cart” button on your site
- A working shopping cart on your checkout page
Before you start: You’ll need a PayPal account to receive payments. A free standard (personal) PayPal account is enough for the Classic/Standard checkout, but if you’d like to use PayPal’s newer Commerce Platform (PPCP) checkout, you’ll need a PayPal Business account. The good news: upgrading to a Business account is free.
Table of Contents
- Step 1. Download the plugin
- Step 2. Upload the plugin to WordPress.
- Step 3. Activate the plugin
- Step 4. Find the eStore menu
- Step 5. Configure your basic settings
- Step 6. Add your first product
- Step 7. Find your Product ID
- Step 8. Add the “Add to Cart” button to a page
- Step 9. Add the shopping cart
- Step 10. Test before going live
- Useful Related Resources
Step 1. Download the plugin
Once you get the product download link in your purchase confirmation email, download the zip file to your computer.
Step 2. Upload the plugin to WordPress.
In your WP admin dashboard, go to Plugins ? Add New, click the Upload Plugin button at the top, then upload the zip file you downloaded in Step 1.
Step 3. Activate the plugin
Click Activate through the Plugins menu in WordPress.
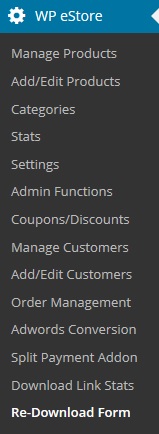
Step 4. Find the eStore menu
After activation, you’ll see the WP eStore settings menu on the left-hand side of your WordPress admin, like this:
Step 5. Configure your basic settings
Go to the Settings menu and review the general, email, and digital product delivery options.
- Most of the default settings are fine to get you started, you only need to customize a few things.
- Important: Change the Random Code field to something hard to guess (this helps secure your downloads).
Step 5a. Set up your checkout (recommended)
Recommended: Use the PayPal Commerce Platform (PPCP) checkout. This is PayPal’s newer, recommended solution. It gives your customers a smoother experience and lets them pay with credit/debit cards as well as PayPal – all without leaving your site.
Follow the step-by-step setup here: PayPal Commerce Platform (PPCP) Checkout Configuration
If you’d rather use the older PayPal Classic/Standard checkout, that’s perfectly fine too — but PayPal itself recommends the new Commerce Platform going forward, so PPCP is the better long-term choice.
Step 6. Add your first product
Go to Add/Edit Products and fill in:
- Product name and price
- Digital Product Download URL — the actual URL of your file (e.g.
https://www.your-domain.com/products/ebooks/awesome_ebook.zip). Don’t worry — buyers never see this URL. They receive an encrypted version after purchase.
Click Submit to save the product.
Step 7. Find your Product ID
Go to Manage Products to see a list of everything you’ve added. Make note of the number in the ID column – you’ll need it for the next step.
Step 8. Add the “Add to Cart” button to a page
Note: You can also copy the shortcode directly from the individual product edit screen. When editing or saving a product, look at the top of the page for the “Shortcode for this Product” section.
Edit any WordPress page or post and paste in this shortcode where you want the button to appear (replace 1 with your actual Product ID from Step 7):
[wp_eStore_add_to_cart id=1]
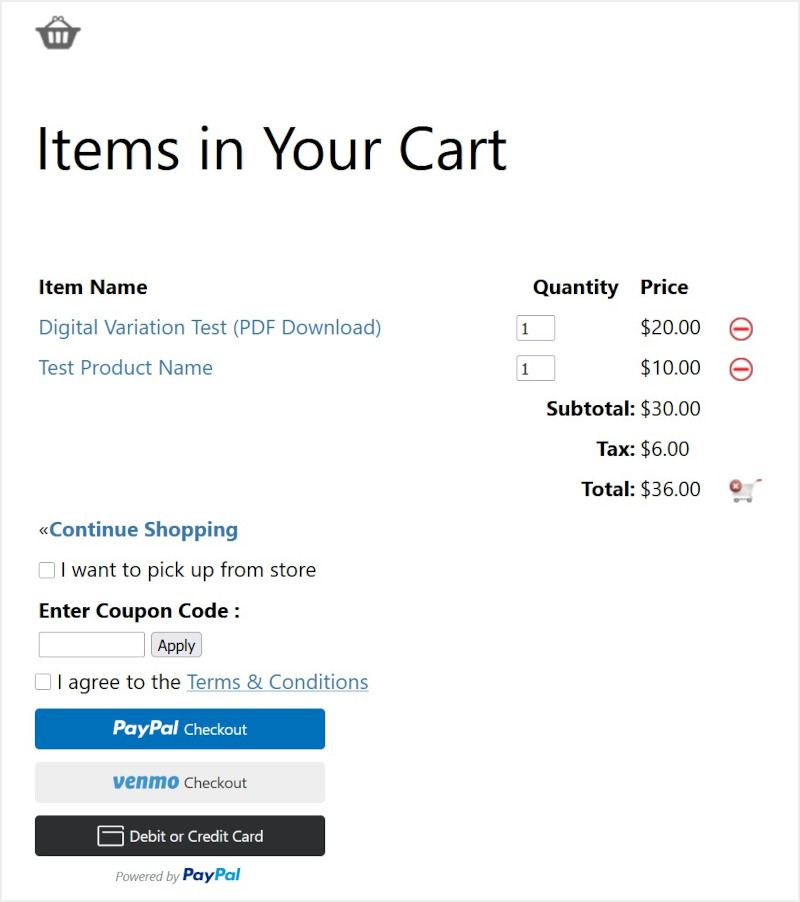
Step 9. Add the shopping cart
Paste one of these shortcodes wherever you want the shopping cart to show up (typically on a dedicated checkout page, in a post, or via a sidebar widget):
[wp_eStore_cart_when_not_empty]
– shows the cart only when items have been added (great for posts and general pages).
[wp_eStore_cart]
– always shows the cart (great for a dedicated checkout page).
Step 10. Test before going live
Before announcing your store to the world, do a quick test purchase using PayPal’s sandbox or a small real transaction. This confirms the payment, the email receipt, and the download link all work correctly. See Testing the WP eStore plugin for details.
That’s it – you’re ready to sell!
What’s Next?
Now that the basics are working, browse the WP eStore documentation to explore more features such as:
- Discount coupons and promotions
- Customizing the email customers receive after purchase
- Adding an affiliate program with the WP Affiliate Platform
- Setting up subscriptions and recurring payments
- Selling physical products with shipping options
Useful Related Resources
- WP eStore Documentation Site – full documentation
- PayPal Commerce Platform (PPCP) Checkout Configuration
- WP eStore quick installation and usage video tutorial
- eCommerce Knowledge Base
- WP eStore Installation & Upgrade Instructions
- Testing the WP eStore plugin
- Configuring a Buy Now type button
The WordPress eStore plugin can be found here.