The following video shows a basic demonstration of how the PayPal Payments Pro Gateway Works
![]()
Read this page to get a good idea of how the checkout flow works when you use the gateway bundle addon.
After you install the WP Payment Gateway Bundle addon plugin you will need to configure some PayPal Payments Pro specific settings in the plugin and in your PayPal merchant profile account. This will let you process credit card on your own site without sending the customer to PayPal’s site.
You will however need to have SSL certificate installed on your site (it is a requirement from the payment gateway).
Video Instructions
PayPal makes frequent changes to their interface so the following video may not match exactly as you see things in your PayPal account. However, it should give you a good idea of how it works and how to set it up.
Written Instructions
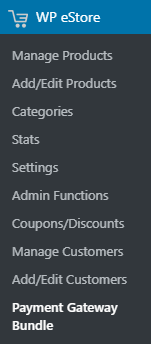
You can find the PayPal Payments Pro Checkout specific settings under the “Gateway Settings†tab when you go to the payment gateway bundle plugin’s settings menu. The following screenshot shows how you can access the settings page of this plugin:
In order to complete the PayPal Payments Pro settings simply follow the steps outlined below:
Step 1) Check the “Use PayPal Payments Pro Gateway” checkbox from the “PayPal Payments Pro Settings” section of the plugin.
Step 2)Â Fill in the API details. There are three pieces of API information that you need to get from your PayPal merchant account and specify it in the plugin so the plugin can process the payment using PayPal payments pro:
- API Username
- API Password
- API Signature

PayPal Payments Pro Setup
If you do not know how to get your PayPal payments Pro API details then the following should help (you can also contact PayPal to get your PayPal Payments Pro account API details):
Getting Your PayPal Pro API Credentials
PayPal frequently makes changes to their interface. So the following steps may not match 100% according to the interface you see in your PayPal account right now. However, the general guideline will still be helpful for you to retrieve your PayPal Pro API details.
- Log into your PayPal account.
- Hover over the gear icon and select Account Settings.
- Go to the Account Access section and select Update next to API Access.
- Find the NVP/SOAP API Integration (Classic) and select Manage API credentials.
- Select Show next to API Username, API Password, and Signature.
- If you have never activated this API, then you may need to request permission for the API first. Select the “Request an API signature†option and submit.
- Once you can see the API Details, copy and paste the details into the settings fields of the Payment Gateway Bundle addon.
Creating Buy Now Type Buttons For PayPal Pro
If you want to use “Buy Now†type buttons instead of the standard “Add to Cart†buttons then check the following documentation to learn how to create buy now buttons for any payment gateways offered in WP eStore plugin:


