Tips and Tricks WP eCommerce

eCommerce Solution for WordPress Blog

  • Home
  • eCommerce Plugins
  • WP eStore Documentation
  • WP Shopping Cart Doc

Shortcode Inserter Addon for eStore Plugin

All the shortcodes are listed on this page. You can copy and paste any shortcode into a standard text or shortcode block.

This addon is no longer needed. The main plugin has this functionality already.

The shortcode inserter addon allows you to easily insert eStore shortcodes into your WordPress post/page editor.

Using This Addon

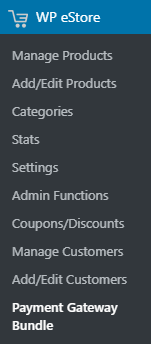
Once you have actived this addon a tinyMCE button (eStore) will appear in your post/page editor. You can click it to directly insert any eStore shortcode. screenshot of the shortcode manager addon

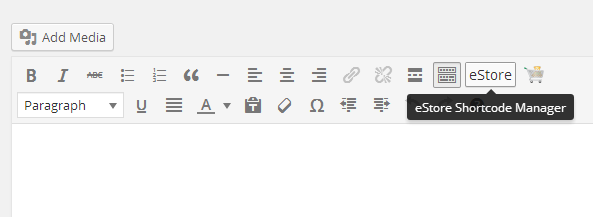
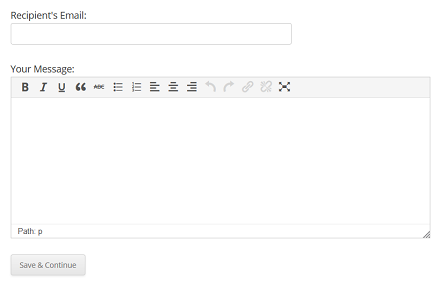
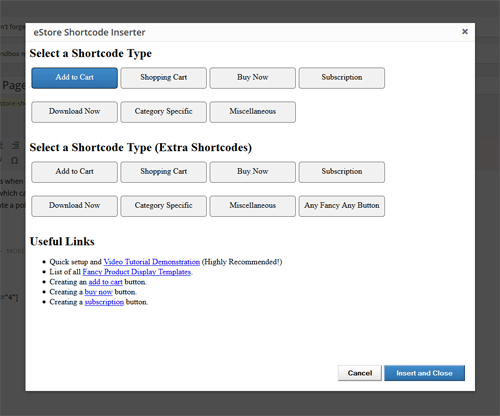
Clicking on the “eStore” button will popup a window where you can choose the shortcode you want to insert.

Select the shortcode then enter any necessary ID value and hit the “Insert and Close” button.

shortcode-inserter-user-interface

Download the Addon (v1.1)

You can download this addon from the addon download area of our support forum.

Please note that some of these free eStore addons are developed by our users in the community. So they do not have any advanced customization option. The description above explains exactly what this addon does.

WP eStore Bulk Discount By Line Item AddOn

The eStore Bulk Discount By Line Item addon allows your customers to automatically get a discount based on the number of items they are purchasing.

Installing the eStore Bulk Discount By Line Item Addon

You can install this addon the same way you install any WordPress plugin:

  • Go to the “Add New” plugins screen in your WordPress admin area
  • Click the “upload” tab
  • Browse for the addon file (eStore-bulk-discount-by-line-item.zip)
  • Click “Install Now” and then activate the plugin

Using this Addon

When this addon is active, You can easily configure some conditions that will be used to automatically apply a discount on the items in the shopping cart.

To configure a new discount condition click on the “eStore bulk discount” sub-menu under the WP eStore plugin menu.

screenshot showing how to access the estore bulk discount addon menu

To add a new discount condition you need to enter the following information:

  • From (Quantity): The minimum number of items required to apply this coupon. For example – 7.
  • To (Quantity): The maximum number of items required in the shopping cart to apply this coupon. For example- 9.
  • Discount Rate (%): The rate of discount in percentage that will be applied on the item amount. For example – 20.

Click the “Save” button which will add the new discount condition.

screenshot showing how to configure a bulk discount condition

How Does the Discount Condition Work

This addon is an improved version of eStore Bulk Discount addon. It calculates the total quantities of an item and apply the discount accordingly (instead of calculating the total quantities of all the items in the shopping cart).

Suppose, you have three products (ID#s: 2, 3, 4) and your condition is configured like the following:

  • Quantity 1 – 4: discount 20%
  • Quantity 5 – 6: discount 25%
  • Quantity 7 – 9: discount 30%

If a user on your site orders product 2 ( quantity – 7), product 3 (quantity – 5), product 4 (quantity – 11) discount will be applied as:

  • Product 2 – discount 30%
  • Product 3 – discount 25%
  • Product 4 – no discount

AddOn Price

The eStore Bulk Discount By Line Item Addon is FREE for all customers who purchased WP eStore plugin from us.

Download the Addon

You can download this addon from the addon download area of our customer only support forum.

General Note

Please note that some of these free eStore addons are developed by our users in the community. So they do not have any advanced customization option. The description above explains exactly what this addon does.

WP eStore Bulk Quantity Shipping AddOn

The eStore Bulk Quantity Shipping addon allows the shopping cart to automatically apply a shipping amount based on the number of items a user is purchasing.

You can pre-configure how much shipping to apply for which item quantity range.

How Does the Bulk Shipping Condition Work

Lets say, you configured one shipping condition and a user just came to your site to do a shopping cart checkout. If the user adds 7-9 items to the shopping cart, a $20 shipping will be automatically applied to the cart.

Installing the eStore Bulk Quantity Shipping Addon

You can install this addon the same way you install any WordPress plugin:

  • Go to the “Add New” plugins screen in your WordPress admin area
  • Click the “upload” tab
  • Browse for the addon file (eStore-bulk-qty-shipping.zip)
  • Click “Install Now” and then activate the plugin

Using this Addon

When this addon is active, You can easily configure some conditions that will be used to automatically apply the shipping amount on the shopping cart.

To configure a new shipping condition click on the “eStore bulk shipping” sub-menu under the WP eStore plugin menu.

screenshot showing how to access the estore bulk quantity shipping addon menu

To add a new condition you need to enter the following information:

  • From (Quantity): The minimum number of items required to apply this shipping amount. For example: 7
  • To (Quantity): The maximum number of items required in the shopping cart to apply this shipping amount. For example: 9
  • Shipping Amount: The shipping amount that will be applied to the cart when the above condition is fulfilled. For example: 20

Click the “Save” button which will add the new shipping condition.

You can add as many conditions as you want.

screenshot showing how to configure a bulk quantity shipping condition

Marking a Product to be a Physical Item

The bulk quantity shipping addon can override and apply the bulk shipping amount to the cart, if the product in question is a physical item. The way to mark a product to be a physical item is to add a shipping amount of 0.01 to the shipping cost of the item. So edit the WP eStore product in question and enter a value of 0.01 to the Item Shipping Cost field.

AddOn Price

The eStore Bulk Quantity Shipping Addon is FREE for all customers who purchased WP eStore plugin from us.

Download the Addon

You can download this addon from the addon download area of our customer only support forum.

General Note

Please note that some of these free eStore addons are developed by our users in the community. So they do not have any advanced customization option. The description above explains exactly what this addon does.

Sell Birthday Greetings – eStore Addon

You can sell birthday greetings with this addon.

It lets your customers enter a message and a recipient’s email address then they purchase the gift item. The digital gift item (a birthday greeting video, audio, PDF etc) is delivered to the recipient with the message after the transaction.

sell-birthday-greetings-example

Usage

Lets say you want to sell a birthday gift item which you have configured in the eStore plugin. The ID of this eStore product is 1.

You can add the following shortcode to a WordPress page that will let your customers buy this item and specify a recipient’s email address and a special message:

[eStore_birthday_greeting id=”1″]

Get the Gift Voucher Addon

The price of this addon is $30.00

Please contact us to purchase this addon.

WP Payment Gateway Bundle Stripe Subscription Setup

After you install the WP Payment Gateway Bundle plugin, you will need to configure some Stripe Gateway specific settings in the plugin which you will need to obtain from your Stripe merchant account.

Note: There are a couple of different checkout flows available for the Stripe gateway. The recommended setup is the Stripe SCA setup explained here.

You can find the Stripe specific settings required by the plugin under the “Gateway Settings” tab when you go to the payment gateway bundle plugin’s settings menu. The following screenshot shows how you can access the settings page of this addon:

In order to configure the Stripe portion of the payment gateway bundle you will need to obtain the required details from your Stripe merchant account by following the steps outlined below:

Step 1: Log into your Stripe merchant account and click on the API Keys menu item (Under Developers).

Step 2:  Copy the values for the secret key and the publishable key as shown in the figure above.

Step 3: Now from your WordPress administration panel, go to Stripe Settings (under WP eStore -> Payment Gateway Bundle -> Gateway Settings) and check “Use Stripe Payment Gateway” option.

Step 4: Enter your Secret Key.

Step 5: Enter your Publishable Key.

Step 6: Enter a selector label for Stripe. For example: Stripe Payment (This text will be displayed in the select box in the shopping cart as a checkout option).

Step 7:  Copy the Stripe Webhook URL for your site and add it as a webhook endpoint in your Stripe account (Developers -> Webhooks). You should only have one webhook set up for our plugin (remove any other URL that you may have configured previously for our plugin)

You can either choose to be notified of all the events (may increase load on your server) or select the ones that our plugin processes at the moment:

  • charge.refunded
  • checkout.session.completed
  • invoice.payment_succeeded
  • customer.subscription.deleted
  • invoice.payment_failed

Step 8: Hit the “Update” button at the bottom to save the settings and now your site is ready to accept subscription/recurring payments via Stripe.

eStore Product Configuration

There are a few things you need to be aware of while you are configuring a product for Stripe subscription.

1) No Trial Payment Amount: Stripe only supports Free Trial. So you cannot charge your customer for the trial period. For example: if you wish to offer one month free trial to your users before they are billed on a recurring basis (2.99/month) you can set up like the following,

  • Trial Billing Amount: 0
  • Trial Billing Period: 1 Month
  • Recurring Billing Amount: 2.99
  • Recurring Billing Cycle: 1 Month
  • Recurring Billing Count: 0
screenshot of eStore product configuration for stripe subscription

If you do not wish to offer a trial, you should leave the Trial Billing Amount and Trial Billing Period fields empty. For example:

  • Trial Billing Amount:
  • Trial Billing Period:
  • Recurring Billing Amount: 2.99
  • Recurring Billing Cycle: 1 Month
  • Recurring Billing Count: 0

2) Recurring Billing: Our Stripe integration supports recurring payments on a daily, monthly or yearly basis. For example: if you wish to charge your customer 2.99/day until cancelled your setup should look like the following,

  • Trial Billing Amount:
  • Trial Billing Period:
  • Recurring Billing Amount: 2.99
  • Recurring Billing Cycle: 1 Day
  • Recurring Billing Count: 0

If you wish to charge your customers 2.99 every 7 days for 3 installments your setup should look like the following,

  • Trial Billing Amount:
  • Trial Billing Period:
  • Recurring Billing Amount: 2.99
  • Recurring Billing Cycle: 7 Day
  • Recurring Billing Count: 3

If you wish to charge your customers 2.99 every/month until cancelled your setup should look like the following,

  • Trial Billing Amount:
  • Trial Billing Period:
  • Recurring Billing Amount: 2.99
  • Recurring Billing Cycle: 1 Month
  • Recurring Billing Count: 0

If you wish to charge your customers 2.99/month for 6 installments your setup should look like the following,

  • Trial Billing Amount:
  • Trial Billing Period:
  • Recurring Billing Amount: 2.99
  • Recurring Billing Cycle: 1 Month
  • Recurring Billing Count: 6

If you wish to charge your customers 2.99 every 2 months until cancelled your setup should look like the following,

  • Trial Billing Amount:
  • Trial Billing Period:
  • Recurring Billing Amount: 2.99
  • Recurring Billing Cycle: 2 Month
  • Recurring Billing Count: 0

3) Reattempt on failure: This checkbox does not have any effect on a Stripe subscription.

4) Editing the subscription amount: Once you make the first transaction of a newly created eStore subscription product, a plan is automatically created in your Stripe account. Stripe doesn’t allow the editing of an existing plan. So if you need to edit the subscription amount after a transaction, create a NEW estore product with the new subscription price.

Shortcode for Subscription Button

You need to embed the following shortcode in a WordPress Post/Page to accept recurring payments via Stripe:

[wp_pg_eStore_subscription_button id="1" gateway="stripe_subsc"]

(Replace 1 with your actual eStore product ID)

Customizing the Look of the Stripe Subscription Button

WP eStore plugin allows you to customize all of your subscription buttons by using a custom button image of your choice. If you want to customize the look of your stripe subscription button then read this post.

Using Stripe Subscription Button with Fancy Display Template

You can use the following shortcode to use a fancy display template with the Stripe subscription button:

[wp_eStore_fancy_display id="50" type="3" style="1" gateway="stripe_subsc"]

WP eStore product ID of the item is 50 in the above example. You will need to change that value to your actual product ID.

WP eStore Bulk Discount AddOn

The eStore Bulk Discount addon allows your customers to automatically get a discount based on the number of items they are purchasing.

Installing the eStore Bulk Discount Addon

You can install this addon the same way you install any WordPress plugin:

  • Go to the “Add New” plugins screen in your WordPress admin area
  • Click the “upload” tab
  • Browse for the addon file (eStore-bulk-discount.zip)
  • Click “Install Now” and then activate the plugin

Using this Addon

When this addon is active, You can easily configure some conditions that will be used to automatically apply a discount on the shopping cart.

To configure a new discount condition click on the “eStore bulk discount” sub-menu under the WP eStore plugin menu.

screenshot showing how to access the estore bulk discount addon menu

To add a new discount condition you need to enter the following information:

  • From (Quantity): The minimum number of items required to apply this coupon. For example – 7.
  • To (Quantity): The maximum number of items required in the shopping cart to apply this coupon. For example- 9.
  • Discount Rate (%): The rate of discount in percentage that will be applied on the shopping cart. For example – 20.

Click the “Save” button which will add the new discount condition.

screenshot showing how to configure a bulk discount condition

How Does the Discount Condition Work

Suppose, you configured one coupon condition and a user just came to your site to do a shopping cart checkout. If the  user has 7-9 items in the shopping cart a 20% discount will be automatically applied to the total cart amount. You can add as many conditions as you want.

AddOn Price

The eStore Bulk Discount Addon is FREE for all customers who purchased WP eStore plugin from us.

Download the Addon (v1.3)

You can download this addon from the addon download area of our customer only support forum.

General Note

Please note that some of these free eStore addons are developed by our users in the community. So they do not have any advanced customization option. The description above explains exactly what this addon does.

WP eStore Addon – File Download Stats

The eStore File Download Stats addon allows you to see which encrypted download links have been used by your users.

Installing the File Download Stats Addon

You can install this addon the same way you install any WordPress plugin:

  • Go to the “Add New” plugins screen in your WordPress admin area
  • Click the “upload” tab
  • Browse for the plugin file (eStore-file-download-stats.zip)
  • Click “Install Now” and then activate the plugin

Using the File Download Stats Addon

You can go to the download link stats menu in eStore admin dashboard to see the download stats of the encrypted links.

file download stats addon menu

You can selectively (between any date range) view the stats of all the purchased file downloads.

estore-download-stats-addon-interface

AddOn Price

The eStore File Download Stats Addon is FREE for all customers who purchased WP eStore plugin from us.

Download the Addon (v1.1)

You can download this addon from the addon download area of our customer only support forum.

General Note

Please note that some of these free eStore addons are developed by our users in the community. So they do not have any advanced customization option. The description above explains exactly what this addon does.

WP eStore MailPoet Newsletter (formerly Wysija) Integration Addon

The eStore Mailpoet Newsletters integration addon allows you to add your eStore plugin customers to the Mailpoet/Wysija list after a purchase.

Installing the Mailpoet Newsletter Integration Addon

You can install this addon the same way you install any WordPress plugin:

  • Go to the “Add New” plugins screen in your WordPress admin area
  • Click the “upload” tab
  • Browse for the plugin file (estore-wysija-newsletter-addon.zip)
  • Click “Install Now” and then activate the plugin

Using the eStore Mailpoet Newsletters Addon

After you install this addon using the above instruction do the following:

Step 1) Create a new list in the MailPoet Newsletters plugin (if you haven’t done so already). Now edit the list you just created and find the unique ID assigned to it.

To edit a list you need to go to MailPoet -> Lists and select the “Edit” option under the list.

mailpoet-lists-menu-screenshot-1

Once you click the “Edit” option you will be able to find the list ID from your browser’s address bar.

mailpoet-list-id-from-the-list-edit-interface

Step 2) Edit the eStore product which you would like to link to your MailPoet list and specify the list ID in the List Name field.

specify list id in product configuration

Save the product and you are done! Now every time  there is a new transaction/squeeze page form submission for this product, the customer will be automatically added to your MailPoet list (ID 3 in the above example).

AddOn Price

The MailPoet newsletter Addon is FREE for all customers who purchased WP eStore plugin from us.

Download the Addon

You can download this addon from the addon download area of our customer only support forum.

General Note

Please note that some of these free eStore addons are developed by our users in the community. So they do not have any advanced customization option. The description above explains exactly what this addon does.

WP eStore Addon – eWAY Rapid 3.0 Payment Gateway

This addon allows you to do a shopping cart checkout using eWAY 3.0 Rapid payment gateway.

Download the Addon

You can download this addon from the gateway addon download area of our support forum.

Installation

You can install this addon the same way you install any WordPress plugin:

  • Go to the “Add New” plugins screen in your WordPress admin area
  • Click the “upload” tab
  • Browse for the addon file (eStore-eway-rapid.zip)
  • Click “Install Now” and then activate the plugin

Using eWAY Rapid 3.0 Payment Gateway Addon

Once you install addon you will need to configure some eWAY Rapid 3.0 specific settings. You can find the eWAY Rapid 3.0 specific settings under the eStore eway rapid menu of WP eStore plugin. The following screenshot shows how you can access the settings page of this addon:

screenshot showing how to access eway rapid addon settings from the eStore menu

In order to complete the eWAY Rapid 3.0 settings simply follow the steps outlined below:

Step 1: Check the “Enable eway rapid gateway” checkbox from the “Eway Gateway Settings” section of the addon.

Step 2: Fill in the API details. There are two pieces of API information that you need to enter in the settings:

  • Your eWAY Rapid 3.0 user API Key
  • Your eWAY Rapid 3.0 user password

screenshot showing eway rapid 3.0 addon settings

Step 3: Enter your preferred checkout text for eway rapid. This text will be used in the eStore shopping cart gateway selection drop down menu if you are using multiple payment gateway options.

Step 4: Enter a title for the order information page. This page will be used to collect order information from your users.

Now hit the Update button and your site will be ready to accept payments using eWAY Rapid 3.0.

How to create an API Key for eWAY Rapid 3.0

If you are not sure how you can create a new api key (also called Username) and password for your eWAY Rapid account you can follow the steps outlined below:

1) Log in to your partner portal account using the link below for your country

  • https://www.eway.com.au/PartnerPortal
  • https://www.eway.co.uk/PartnerPortal
  • https://www.eway.co.nz/PartnerPortal

2) Go to My Account > User Security > Create User and complete the form.

3) Click on Actions next to the new user and View API Key. This is your new API key and password for accessing Rapid API.

WP eStore Browse Products by Category Addon

The eStore browse products by category addon can be useful for users who have a lot of products and categories and want their visitors to be able to browse their products by categories.

AddOn Price

The eStore Browse Products by Category Addon is FREE for all customers who purchased WP eStore plugin from us.

Download the Addon

You can download this addon from the addon download area of our customer only support forum.

Installing the Addon

You can install this addon the same way you install any WordPress plugin:

  • Go to the Add New plugins screen in your WordPress admin area
  • Click the upload tab
  • Browse for the plugin file (eStore-browse-products-by-category.zip)
  • Click Install Now and then activate the plugin

Using the eStore Browse Products by Category Addon

After you install this addon using the above instruction do the following:

Step 1) Install the Extra eStore Shortocodes addon (if you haven’t done so already). The extra eStore shortcodes addon has a few nice functions that this addon utilizes.

Step 2) Create a WordPress page where you want to list your products by category.

Step 3) Enter the following shortcode in this page:

[wp_eStore_browse_by_category]

Now your visitors can go to this page and browse your products by categories and add products to the shopping cart. The following screenshot shows an example of how the categories will be listed:

Fancy Display Template for the Product Listing

By default, the products are listed using the fancy 1 display template (when someone clicks on “Browse Products” link of a category). If you want to use a different template, then you can use the “product_listing_style” parameter in the shortcode to specify the template number.

Example shortcode usage below:

[wp_eStore_browse_by_category product_listing_style="14"]

It will use fancy 14 display template to show the product listing when someone clicks on “Browse Products” link of a category.

General Note

Please note that some of these free eStore addons are developed by our users in the community. So they do not have any advanced customization option. The description above explains exactly what this addon does.

« Previous Page
Next Page »

Your Shopping Cart

Shopping Cart Empty
Shopping Cart is Empty
Visit The Shop

Search

Featured Documents

Stylish Product Display Options for WP eStore WP eStore Quick Setup and Usage Video Tutorial WP eStore Shortcodes and Functions Reference WordPress eStore Plugin Features WordPress eStore Plugin Demo What Our Customers Have to Say About Our Products WordPress eStore WishList (Feature Suggestions) WordPress eStore Frequently Asked Questions (FAQ) How to Show Add to Cart buttons

Featured Plugins

WP Express Checkout Plugin
wordpress_estore_icon
wordpress membership plugin icon
wordpress_affiliate_plugin_icon

Copyright © 2025 | eCommerce Plugins