The eMember Form Builder Addon allows you to create registration and edit profile forms with custom fields.
WP eMember has a feature that allows you to control which fields appear on your membership registration form. It also lets you add your own custom fields to the registration form. The form fields customization documentation has details of this core plugin feature.
However, we have found that a few businesses out there need more flexibility in terms of customizing the form fields of the membership registration form. This addon was created to solve that issue. It allows you to create registration form(s) with whatever custom fields you require using a drag and drop system.
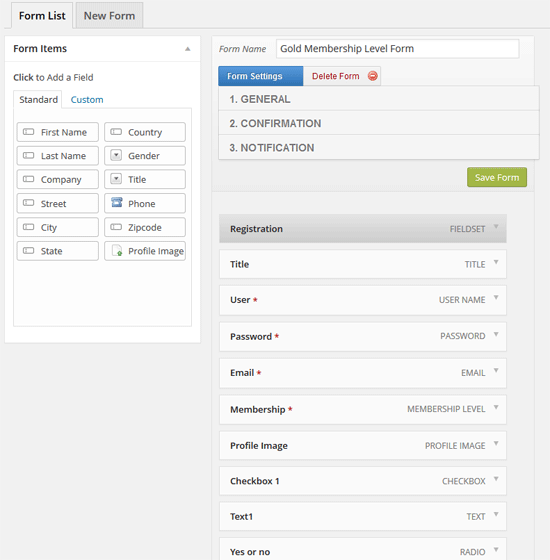
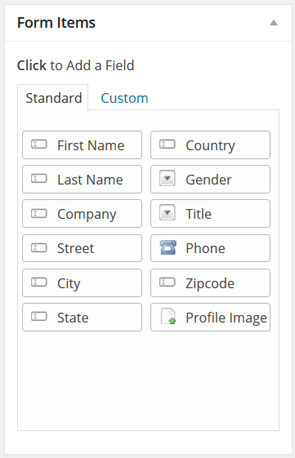
The following screenshot shows the various types of custom fields that you can add to your membership registration and edit profile forms to collect details from your members.

You can customize various details of each custom fields that you add to the form:

You can also create fields that are “ReadOnly” so your members can only see the content of the field but can’t edit it.
There is an option to create “Hidden” fields too. Hidden fields are not visible to the members (only admins can see the content of the hidden fields).
Installing the Form Builder Addon
- Click on the “Add New” menu under the plugins interface.
- Go to the “Uploader” tab and upload the emember-form-builder.zip file
- Hit the “Install Now” button and then activate the addon
Form Builder Addon Usage
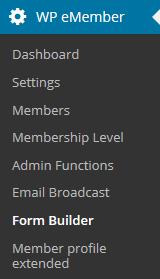
Go to the form builder menu from the main eMember admin dashboard menu:
Click on the “New Form” link to create a new custom form:
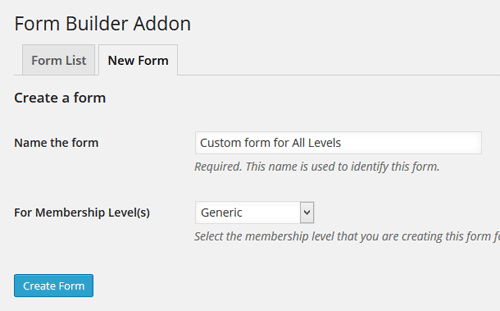
You can create a custom form for each of your levels. However, you should create a “Generic” form first that way if you don’t have a custom form for a specific level, it will use the generic one for that level.
After you hit the “Create Form” button, you will be in the form customization interface where you will be able to visually add or remove fields for the registration and edit profile forms.
You have the option to apply the following rules to your custom fields:
- Show the field in the registration page only.
- Show the field in the edit profile page only.
- Make the custom field a required field (so a user has to enter a value in that field).
- Make the field read-only (a user can only view the value of that field, edit is not allowed).
- Show the field in the admin interface only (so only admin user can enter value there).
How do I show the Custom Form?
The custom forms you create in the form builder addon works with the existing registration page (and the registration page shortcode). The same goes for the edit profile page also.
You don’t need to do anything else other than to just create your custom forms and save the forms.
When your users visit the registration page, they will see the appropriate custom registration form (just like the standard eMember registration form). Don’t go to the registration page directly and expect to see a particular custom form.
You must read the following two documentation to learn how the registration form rendering behaves in the plugin:
- How the plugin uses one registration page to handle all types of member registration
- Typical member registration process overview
Placing a Custom Registration Form for a Particular Level
If you want to put a registration form for a particular membership level on a page for whatever reason, you can do that using the standard shortcode.
Read this documentation which explains how you can put a registration form for any level on any page.
Viewing the Custom Field Values
The site admin can go to the members menu of the eMember admin dashboard and edit a member record to view the custom fields of that member (just the same way you would view any other details of a member).
Also, if you have enabled the “Send Notification to Admin” option for the “Registration Complete” email, then the admin will receive the custom field values in that notification email.
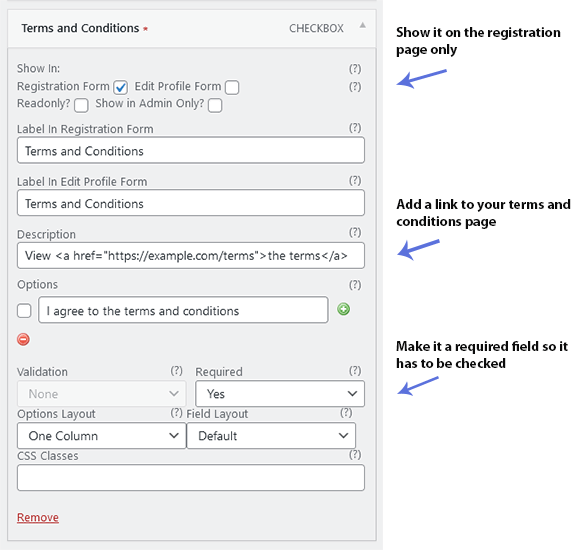
Adding a Terms and Conditions Checkbox
You can use a “Checkbox” type field to add a terms and conditions checkbox to the registration form. This will force users to agree to your terms before they can complete the registration.
The following is an examaple showing how you can configure a simple terms and conditions checkbox.
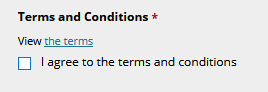
The following screenshot shows how this terms and conditions checkbox looks on the front-end
Video Tutorial Showing the Basic Usage
Get This Addon/Extension
The price of this addon is $39.00
Leave a Reply