Tips and Tricks WP eCommerce

eCommerce Solution for WordPress Blog

  • Home
  • eCommerce Plugins
  • WP eStore Documentation
  • WP Shopping Cart Doc

How to Setup a Revenue Sharing Product Selling Site (Split Profit Setup)

If you are setting up a revenue sharing site (to split profit with a partner) whereby you want to share the profit of the products with the author/creator of the product then you can use the “Revenue Sharing” feature of WP eStore.

How Revenue Sharing Works

WP eStore allows you to setup a revenue sharing site with the help of the WP Affiliate Software. Basically, you setup your authors as an affiliate then specify the affiliate ID of each author to their corresponding products when setting up the product in eStore (this links the author with a particular product). When a product is sold, eStore checks to see if this product is using revenue sharing. If revenue sharing is used for that product then it awards the appropriate amount to the corresponding author of the product in the form of affiliate commission. The commissions will keep accruing whenever this product sells. You can then payout all the outstanding commission (the authors share) at the end of the month or week or whatever.

How to Use the Revenue Sharing Feature

Step1: Enable the revenue sharing feature from the “AddOn” settings menu of WP eStore

Enable Revenue Sharing

Step2: Create an affiliate account for each of your authors/product creators (You can create affiliate account from the “Add/Edit Affiliates” menu of the WP Affiliate Platform plugin)

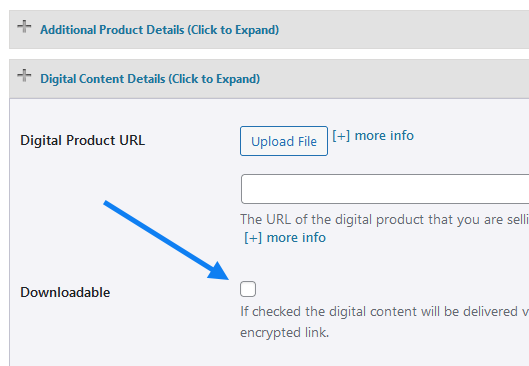
Step3: Specify the corresponding affiliate ID in the “Author ID for Revenue Sharing” section of the product when configuring the product in eStore.

Linking a product to a revenue sharing author

Linking a product to a revenue sharing author

Additionally, you can override the commission level to be used for this product’s revenue sharing calculation by specifying a number in the “Revenue Sharing Commission Level” field. This field is not mandatory. If you do not specify any value in this field it will simply use the commission level specified in the author/affiliate’s profile for revenue sharing calculation.

How the Revenue Sharing Cuts Work For Normal Transactions

The revenue sharing for normal transactions are very straightforward. The “author/partner” gets the percent specified in the revenue sharing section for the product.

For example, lets say it is a $100 Product and you have specified the author/partner to get 50%. The calculation will look like the following:

  • 50% author’s cut (so the author of the product gets $50)
  • The leftover is for the house ($50 in this case).

How the Revenue Sharing Cuts Work When Used Together with Normal Affiliate Commission

When revenue sharing is used in conjunction with a normal affiliate campaign then the calculation works like the following:

For exmaple, lets say it is a $100 Product and you specified the author to get 50% and the affiliates to get %50. The calculation will look like the following:

  • 50% affiliate commission (so affiliate gets $50)
  • 50% author commission (the author of the product gets 50% of profit). The affiliate commission is deducted from the product price and then the author gets 50% of the left over. So in this case the author will get 50% of ($100-$50) which equals to $25.
  • The leftover is for the house ($25 in this case).

How to Bulk Upload eStore Products from a CSV File

You can use the WP CSV to DB plugin to upload product details from a CSV file into the WP eStore’s database.

Note: The WP CSV to DB Plugin may not work on all servers. If this happens to you then note that you can directly import content into MySQL database via PHPMyAdmin (you can find it from your cPanel). The video tutorial on How to Easily Import or Export any of Your WordPress Database Content article will help.

1. Setup/Preparation

  • Install the WP CSV to DB plugin.
  • Download the Products.csv template file and open it using Microsoft Excel.
  • Fill up the product details; One product per row (There are two example entries in that file so replace them with actual product details).
  • Once you are done entering all your product details then save the file as a CSV file.

2. Select the Database Table

  • Select the “wp_wp_eStore_tbl” option from the Database Table Name field (this is the database table name for the WP eStore’s products table given that you did not manually change the wordpress database table’s prefix).

3. Specify the Input CSV file

Simply use the upload option to upload the CSV file created in the setup/preparation step.

4. Specify the Options

  • Use a value of 2 in the “Select Starting Row” field (the first row is the column heading so we don’t want to import that row).
  • Check the “disable auto_increment column” field (this way the ID column values will be automatically generated for you).

5. Import into the Database

Hit the magic “Import to DB” button which will dump the product details from the CSV file into the eStore products database table.

The following screenshot shows the values you should be selecting when importing.

csv-to-db-product-import-settings

Now if you browse to the “Manage Products” menu of WP eStore, you should see all the new products that you just added.

Assigning Category To Your Bulk Uploaded Products

After you bulk upload your product you may want to assign some categories to some of the products you just uploaded.

  1. Download the product_id_to_category_relationship.csv template file and open it using Microsoft Excel.
  2. Fill up the category to product relation details; one per row (There are a few example entries in that file so replace those IDs with actual product and category ID).
  3. Browse to the CSV to DB plugin settings.
  4. Select “wp_wp_eStore_cat_prod_rel_tbl” from the “Database Table Name” field.
  5. Upload the CSV file and import it.
  6. Enter 2 in the starting row field
  7. Hit the “Import to DB” button

WP eStore License

WP eStore
End User License Agreement
Copyright, Tips and Tricks HQ (https://www.tipsandtricks-hq.com/)
All rights reserved.

This plugin uses the GNU General Public License. By using the software, you agree to be bound by the terms of GPL license. If you have any questions about the terms, please contact Tips and Tricks HQ for clarification.

WP Shopping Cart and WP Super Cache Workaround

If you are using the WP Super Cache plugin on your WordPress blog together with a WordPress Shopping Cart plugin (example: Simple WordPress Shopping Cart) then there is a good chance that you are experiencing some funny behavior with your cart plugin (example: the shopping cart doesn’t show the products after item addition).

The Problem

The reason behind it is that the WP Super Cache is a static caching plugin. It generates HTML files that are served directly by Apache without processing PHP scripts. So when a visitor on your blog adds a product to the shopping cart and is wondering why it’s not being displayed in the basket is probably because he/she is still loading the static HTML (cached) file of that page.

The Workaround

Go to your WP Super Cache plugin’s Advanced Settings menu and check the following option then save it:

  • Cache Delivery Method -> Simple
  • Disable caching for visitors who have a cookie set in their browser

The following screenshot shows the settings:


Older Version of WP Super Cache

If you’re using an older version of the WP Super Cache plugin, the following screenshot shows the relevant configuration.

wp super cache workaround

Feel free to leave a comment if you are having any issues with this workaround.

Visit the WP Shopping Cart plugin page.

WordPress Shopping Cart – Additional Resources

WP Shopping Cart CSS

The following CSS classes have been included in the plugin. You will just have to update the CSS in the style sheet file (wp_shopping_cart_style.css) of the wordpress paypal shopping cart plugin if you want to customize the look and feel of the shopping cart.

  • shopping_cart
  • wp_cart_button.
  • wp_cart_checkout_button

Where is the Settings Menu for the Shopping Cart?

The settings menu for the Shopping cart is located under the Simple Cart Admin menu. Please see the following screenshot:

simple-shopping-cart-settings-menu-sc-1

How to Make the Shopping Cart Show the “Empty Cart” Message on a Post or Page

Use the following cart shortcode which will show the cart even if there are no items in it. When the cart is empty, it will show an empty cart message.

[always_show_wp_shopping_cart]

How to Resize the Add to Cart Buttons

Add the following to the CSS file of this pluign (wp_shopping_cart_style.css)

.wp_cart_button{
height: 20px;
width: 76px;
}

You will have to adjust the size to your needs.

How to Show the Add To Cart Buttons in the Sidebar (Method 1)

We have recently added new shortcodes that uses the WordPress shortcodes API. You can use these shortcodes to place a purchase button for a product on the sidebar widget of your WordPress site:

Here is how to do it:

Step 1) Go to the widgets menu of your WP Admin

Step 2) Add a standard text widget to the sidebar of your site

Step 3) Use one of the shortcodes to create a purchase button for your product that you want to sell:

[wp_cart_button name=”Test Product One” price=”29.95″]

[wp_cart_button name=”Test Product Two” price=”19.95″ shipping=”4.99″]

How to Show the Add To Cart Buttons in the Sidebar (Method 2)

Step 1) Download and activate the Executable PHP code plugin if you don’t have it already (any other PHP executable plugin will work too):

This plugin lets you call php functions from the widgets (it’s similar to the Text widget but it allows you execute PHP code too).

Step 2) Go to the widgets menu and add a ‘PHP Code’ widget to the sidebar (where you want to display the ‘Add to Cart’ buttons or shopping cart). Now you can enter HTML and PHP code here to display whatever you want to show. For example, entering the following line will display an add to cart button:

<?php
$product_name = "Product Name";
$product_price = "10.00";
echo print_wp_cart_button_for_product($product_name, $product_price);
?>

How to Collect Special Instructions from the Customer

If you need to collect special instructions from the customer for some customized work on the item you are selling then you can use the Collect Customer  Input Addon.

Setting up PayPal IPN Notification Feature

Read the PayPal IPN setup documentation.

Get the Total Number of Items in the Shopping Cart

If you are creating a mod/tweak for the simple shopping cart and you want to know the total number of items in the cart then check this post.

Return to the WP Shopping Cart plugin page.

How Shipping Address is Collected from the Customer

As the shop admin, you will need the shipping address of the customer to ship physical products but know that you don’t have to do anything special. PayPal handles the shipping address collection and will email you with postage information after a payment so you can ship the product.

Triggering Shipping Address Collection for Digital Items

If you are selling physical products (with a shipping fee) then it will trigger a shipping address collection during the checkout process.

By default, WP eStore plugin doesn’t trigger the shipping address collection for digital products as it’s an unnecessary step that we can skip to speed up the checkout process. If you have a product that is not really a physical product but you still want to collect shipping/mailing address, do the following to trigger address collection during checkout.

Step 1) Edit the product in question and uncheck the “Downloadable” checkbox.

Step 2) Add a value of 0.001 in the “Item Shipping Cost” field. This will make it so it doesn’t charge a shipping amount but it will trigger hte address collection.

This is how it works:

  • A customer clicks on the Pay Now/Checkout button and goes to PayPal to pay for the product or service.
  • The customer fills in the credit card details or logs into his/her PayPal account and reviews the order.
  • Now before hitting the “Pay Now” button the customer can use the default shipping address (taken from his/her PayPal account) or specify a different shipping address by clicking on “Change Shipping” that is shown below the default shipping address.
  • After payment, PayPal will send you a payment confirmation email which will have this postal address so you can ship the item.
  • The plugin will also capture the address in the “Cart Orders” menu inside your WordPress admin dashboard.

Shipping Address Collection When Paying from PayPal account

Shipping Address Collection When Paying from PayPal account

Shipping Address Collection When Paying using a Credit Card

Shipping Address Collection When Paying using a Credit Card

Alternative Option

The other option is to drop a shipping address collection form similar to the one shown in the following screenshot on the “Thank You” page. This way when the customers get redirected to the “Thank You” page after paying on PayPal, they can enter their shipping address. The content of the form (the address in this case) is mailed to you when the customer hits the submit button.

shipping-address-form

It is really easy to add a form similar to the one shown above using a WordPress contact form plugin. I use the Contact Form 7 plugin which allows you to add a customized form on any page to collect info from visitors.

WordPress eStore Plugin Details

WordPress eStore is not a heavyweight online store/e-Commerce system. It is a simple and easy-to-use WordPress plugin that allows you to sell any kind of products (tangible and non-tangible) or services directly from your own site, with payment via PayPal, 2Checkout or Manual payment. It has the design flexibility to blend into your site’s look and feel, it has a shopping cart facility to handle sales of multiple products, and it provides purchasers with a customized time-limited encrypted download link to maintain the security of your digital assets. Best of all, it can be set up in less than five minutes.

The WP eStore plugin allows you to add “Add to Cart”, “Buy Now” or “Subscription” buttons anywhere on your wordpress blog (eg. posts, pages, sidebars) easily. It allows you to add the shopping cart anywhere on your blog too (eg. posts, pages, sidebars). The shopping cart shows the user what they currently have in the cart and allows them to remove the items.

After the buyer makes a payment, a pre-configured email is automatically sent to the buyer with an encrypted product download link (multiple links if the buyer purchased multiple products). The link automatically expires after a configured time.  The seller also gets a product sale notification email. This is why the WP eStore plugin is great for selling digital products (ebook, mp3, photos etc) directly from your wordpress blog.

The encrypted link can be configured so it redirects the buyer to a web page when clicked. This is particularly useful when you want to set up a video on demand (V.O.D) system for example. You can also use this plugin to send membership info (login and password) to the buyer after he/she has paid for it.

With this plugin you can design the way you want to display the product listing (You use the WordPress editor to design the way you want the product listing to appear with images, inside a table  etc, then just add an ‘add to cart’ button next/below the product with the trigger text which allows the buyer to purchase the product). You also have the flexibility of showing the shopping cart anywhere (posts, pages, sidebar) on your blog.

How to sell Both Digital and Non Digital Product with the WordPress eStore plugin

The WordPress eStore plugin is mainly used for selling digital products securely from your blog but you can still sell non-digital products using this same plugin. To sell non-digital content just leave the Download URL field empty when you add the product to the database. This way when the buyer receives the courtesy/confirmation email it won’t have any link there. Instead it will say there is no downloadable content for this product.

Shipping cost is only added to the cart if any item in the cart has a product with shipping cost specified in the “Shipping Cost” field of the product. So for example, if a customer adds a digital product together with a physical product to the cart only then the shipping cost of the Physical product and the base shipping cost (If this is specified in the settings menu) is applied to the cart.

Below is a screenshot of how the shopping cart looks like when someone adds both a digital and a physical product to the cart:

Shopping Cart Screenshot with both Physical and Digital products

Shopping Cart Screenshot with both Physical and Digital products

And this is a screenshot of what the customer will see in the email or the “Thank You” page after payment:

Screenshot of a Post Payment Message

Screenshot of a Post Payment Message

Please refer to the shipping cost calculation guide to understand how shipping cost is calculated for non-digital products.

Your Shopping Cart

Shopping Cart Empty
Shopping Cart is Empty
Visit The Shop

Search

Featured Documents

Stylish Product Display Options for WP eStore WP eStore Quick Setup and Usage Video Tutorial WP eStore Shortcodes and Functions Reference WordPress eStore Plugin Features WordPress eStore Plugin Demo What Our Customers Have to Say About Our Products WordPress eStore WishList (Feature Suggestions) WordPress eStore Frequently Asked Questions (FAQ) How to Show Add to Cart buttons

Featured Plugins

WP Express Checkout Plugin
wordpress_estore_icon
wordpress membership plugin icon
wordpress_affiliate_plugin_icon

Copyright © 2025 | eCommerce Plugins