Tips and Tricks WP eCommerce

eCommerce Solution for WordPress Blog

  • Home
  • eCommerce Plugins
  • WP eStore Documentation
  • WP Shopping Cart Doc

WP eStore – How Does the Manual Checkout Option Work?

This documentation will address the usage and setup of the ‘Manual/Off-line Checkout Settings‘ feature of the WP eStore plugin.

What is the Manual Checkout Option?

The manual checkout option (when enabled) allows your customers to proceed to checkout with an item without needing to pay. This feature is useful if you have a business that has physical products where most of the transactions occur offline. Other business owners are able to use this feature to sell items to a non-for-profit organization where they give the items in return for a payment later on. The ‘Manual Checkout Option’ is also widely used for companies that wish to offer an in-store pickup and payment option. This feature is fully customizable allowing you to:

  • Choose if the product database is updated automatically after a manual checkout
  • Add a shipping charge
  • Customize emails sent from the plugin to both the seller and the buyer
  • Direct your customers to a specific page after the checkout is complete
  • Decide on functions that relate to the WP Affiliate and WP eMember plugins
manual-checkout-option

How Do my Customer’s Checkout with the Manual Option?

1) Your customer goes to your store and checks out via the manual checkout option.

2) The customer gets an email that contains all the items he/she ordered.

3) The customer also gets some “instructions” in the email. You specify the instructions in the “Directions for the Customer” field under the manual checkout settings section. This instruction could read:
“Come to our store [address of your store] with the money to pickup your item.”

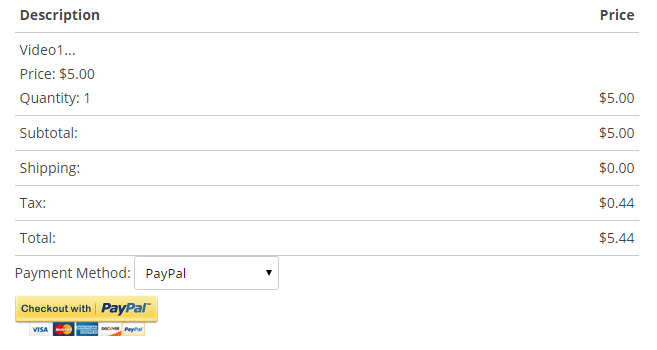
Example: Ability to Manually Checkout

manual-checkout-box

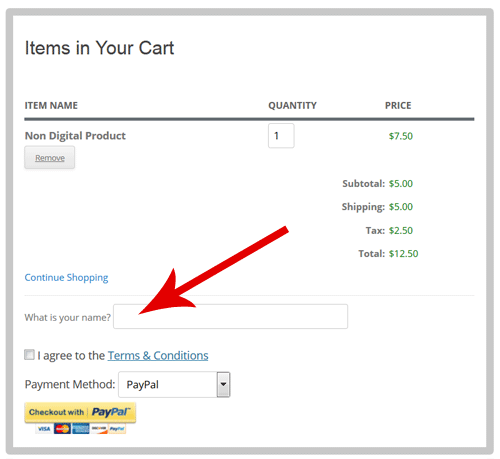
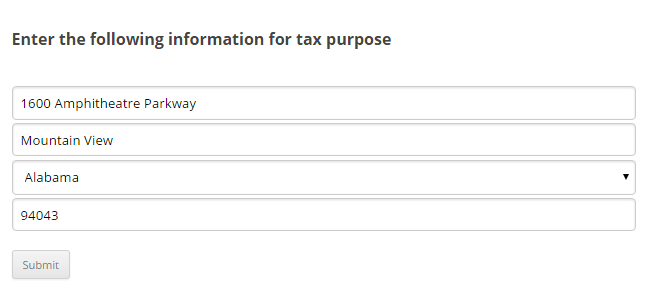
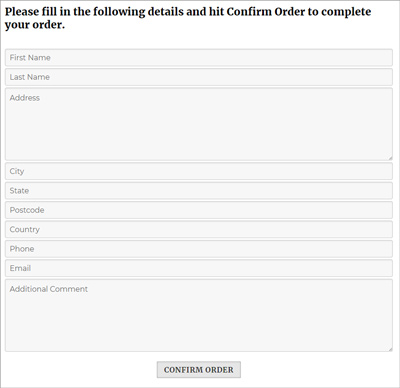
Example: Manual Checkout Form

form-for-manual-checkout-option

Locating the Manual Checkout Option

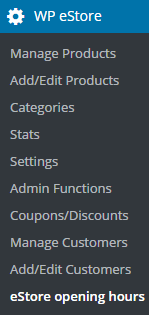
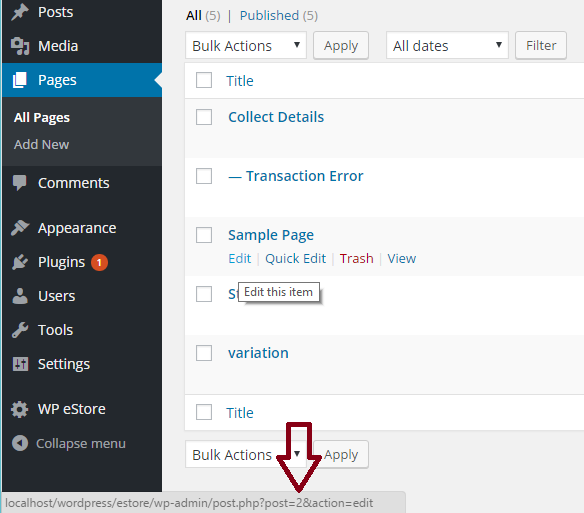
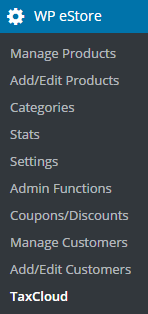
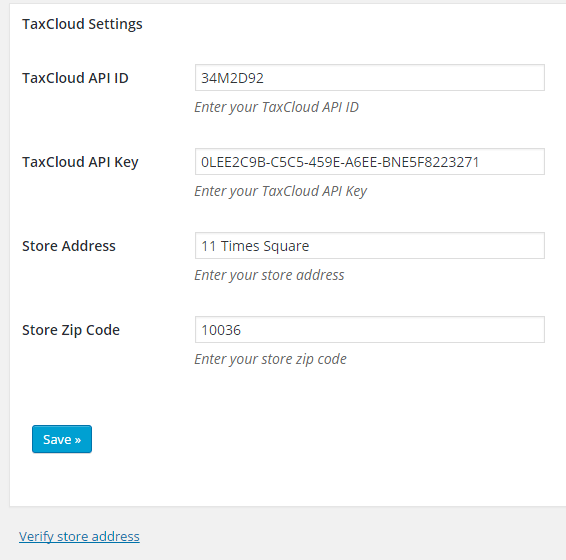
The manual checkout option is located in the ‘Settings’ menu of the WP eStore plugin.

  1. Click on the ‘Settings’ menu of the WP eStore plugin.
  2. Click on the ‘Payment Gateway Settings’ tab.
  3. You will now see a section titled ‘Manual/Off-line Checkout Settings’. This documentation will focus on this feature of the plugin.

Configuring the Manual Checkout Option

Configuring the manual checkout option is simple and easy.

Step 1) Under the ‘Payment Gateway Settings‘ tab, you will need to check the ‘Use Multiple Payment Gateways‘ box to be able to offer both a standard checkout (for example, PayPal) and a manual checkout to your customers.

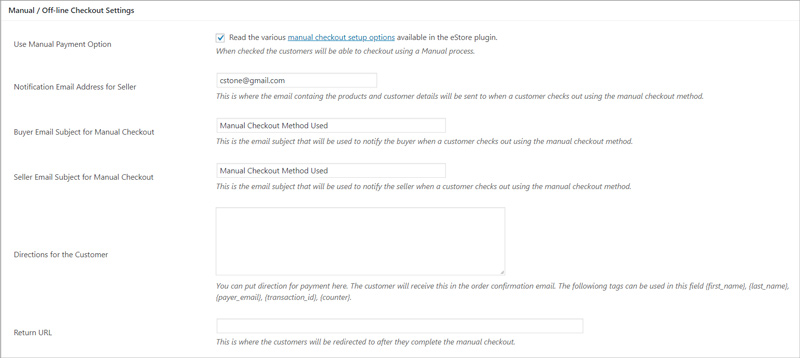
Step 2) Use the above steps to locate the ‘Manual Checkout Options’ area. Check the box next to ‘Use Manual Payment Option‘ to enable this feature.

Step 3) Enter in the email address of the seller (merchant) and choose a subject for the emails that will be sent from the plugin.

Step 4) If you would like to add directions for your customers, you can type these in the ‘Directions for Customers‘ box. Email tags can be used in this field.

Step 5) Paste in a return URL where you would like to send your customers after they have enter in their details for manual checkout.

manual-checkout-options

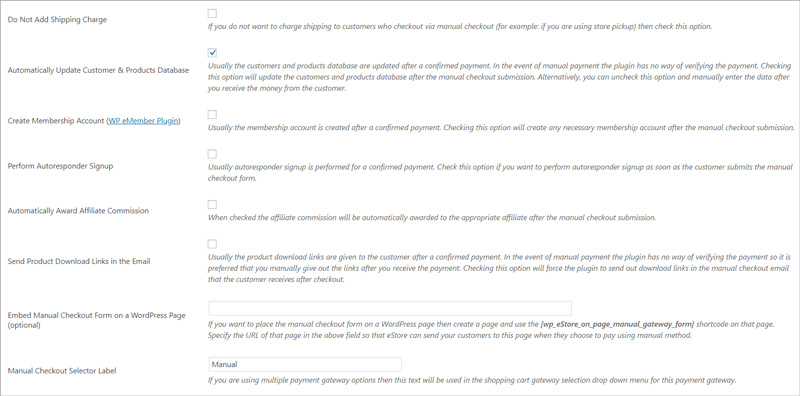
Step 6) Tick the boxes for the following if they apply to your product: ‘Do Not Add Shipping Charge‘, ‘Automatically Update Customer & Product Database‘, ‘Create Membership Account‘, ‘Perform Autoresponder Signup‘, ‘Automatically Award Affiliate Commission‘ and ‘Send Product Download Links in the Email‘.

Step 7) You can edit the title of the ‘Manual Checkout Option’ viewed by your customers from the word ‘Manual’ to the wording of your choice in the ‘Manual Checkout Selector Label‘ field.

Step 8) Ensure you ‘Update‘ the changes you have made.

manual-checkout-full-options

There are several ways to set up the manual/offline payment option for your site. It’s also a good idea to read this post, which outlines the available options.

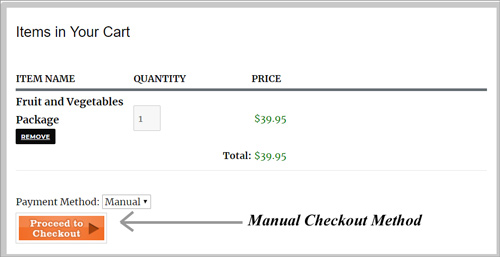
Promoting Manual Checkout for the Products

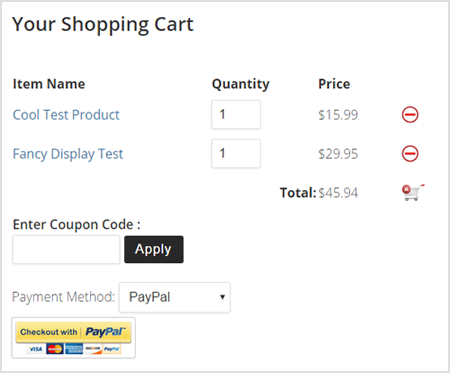
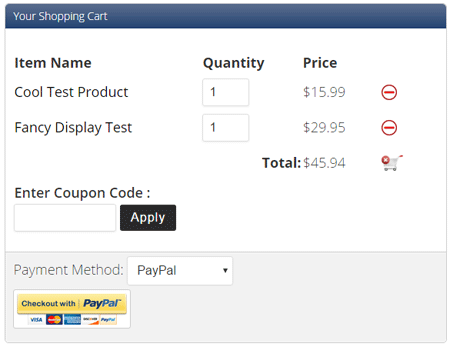
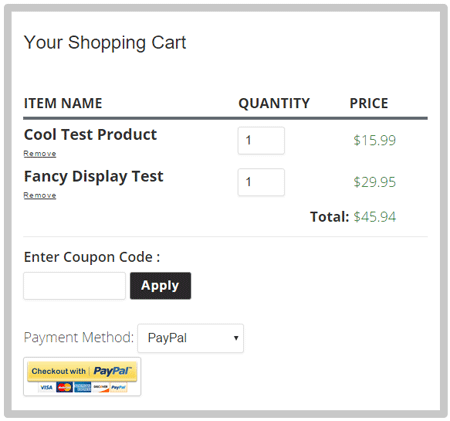
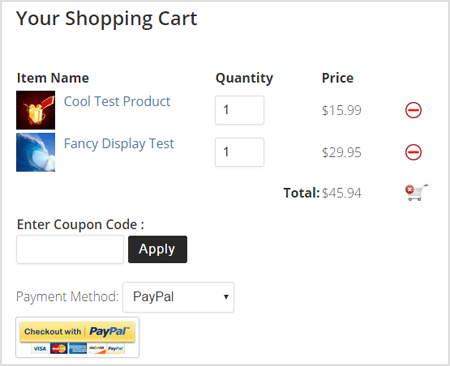
To give your customers the option to use the ‘Manual Checkout Option’ you will need to use an ‘Add to Cart’ button. This can be a ‘fancy’ add to cart button or a simple add to cart button. Using a ‘Buy Now’ button will not offer your customers the choice of ‘Manual Checkout’. Your customer will see the option to checkout manually when they view the ‘Shopping Cart’. The ‘Manual’ option appears beneath their item total in a drop down menu. To complete a manual order, your customer will be required to fill in an order form.

When a customer checkouts using the ‘Manual’ option, their ‘Payment Status’ will appear as ‘Unpaid‘. This can be manually edited by admin once the customer pays cash in person or transfer money into the business account.

WP eStore and ConvertKit Integration Addon

You can integrate the WP eStore plugin with Convertkit so that the customers can be automatically added to your ConvertKit sequence.

The users are added to the ConvertKit sequence when any of the following event happens:

  1. A customer purchases a product that has a ConvertKit sequence specified for it.
  2. A visitor submits a squeeze form for a product that has a ConvertKit sequence specified for it.

Installing the ConvertKit Addon

You can install this addon the same way you install any WordPress plugin:

  • Go to the Add New plugins screen in your WordPress admin area
  • Click the Upload button
  • Browse for the addon file (estore-convertkit-addon.zip)
  • Click Install Now and then activate the plugin

Addon Usage

Step 1) Click on the ConvertKit menu link from the main eStore plugin’s admin menu.

Step 2) Enable the integration then fill in the API key details. You can get the API details from your ConvertKit account.

Step 3) Edit the eStore product in question and specify your ConvertKit Sequence Name in the List Name field of the product.

Example value: my-cv-sequence

autoresponder-list-name-in-product

Get the ConvertKit Addon

The price of this addon is $39

WP eStore – Amazon S3 Integration Addon

The Amazon S3 Integration addon allows you to securely store and deliver digital downloads using Amazon’s Simple Storage Service (S3).

You can serve the private/protected files from your amazon S3 account using this addon.

Table of Contents

  • Minimum Requirement
  • Download the Addon
  • Installing the eStore S3 Integration Addon
  • Using the WP eStore S3 Addon
    • Step 1) Enter Your Amazon S3 API Details
    • Step 2) Enter the File/Object Link in eStore Product
  • Testing Encrypted Download from Amazon S3
  • What File Permission To Use in Amazon S3
  • Force File Downloads Instead of Opening in the Browser
  • Important Notes
[Read more…]

WP eStore and ActiveCampaign Integration Addon

You can integrate the eStore plugin with ActiveCampaign autoresponder so that the customers can be automatically signed up to your ActiveCampaign list (with any tags that you want to apply).

The users are added to the ActiveCampaign list when any of the following event happens:

  1. A customer purchases a product that has an ActiveCampaign list ID specified for it.
  2. A visitor submits a squeeze form for a product that has an ActiveCampaign list ID specified for it.

Installing the ActiveCampaign Addon

You can install this addon the same way you install any WordPress plugin:

  • Go to the Add New plugins screen in your WordPress admin area
  • Click the Upload button
  • Browse for the addon file (estore-active-campaign-addon.zip)
  • Click Install Now and then activate the plugin

Addon Usage

Step 1) Click on the ActiveCampaign menu link from the main eStore plugin’s admin menu.

Step 2) Enable the integration then fill in the API key and API URL details. Then hit the “update” button to save.

You can get the API details from your ActiveCampaign account.

Step 3) You need to get the List ID of the list where you want to add the users.

Getting the List ID value of Your ActiveCampaign List

If you select the list and look in the URL you should see the list id there:

activecampaign-list-id-value

Edit the eStore product in question and specify your ActiveCampaign List ID in the List Name field of the product. Example value: 2

autoresponder-generic-list-id-tag-id-setup

The addon will add the customer to this list.

Specifying Tags (Optional)

Optionally, you can specify tags together with the list ID value. Lets say the list ID is 2 and you want to apply tags “tag1”, “tag2” and “tag3”. You would enter the list ID and tags using the following format:

2|tag1,tag2,tag3

Get the ActiveCampaign Addon

The price of this addon is $29.95

WP eStore Addon – Collect Customer Input in the Shopping Cart

WP eStore plugin has a built in option to collect customer input for each of your products. However, if you need to collect an input from your customers in the shopping cart (not just for individual products) then this extension should be helpful.

You can use this addon to collect upto 2 custom input from your customers per shopping cart transaction.

It can be used to show an input field in the cart like the following example:

estore-cart-with-customer-input-field-example
[Read more…]

WP eStore – Store Opening Hours AddOn

The eStore Opening Hours addon allows you to restrict purchases to certain times. You can configure as many opening/closing times for your shop (each day of the week) in the settings. When a visitor comes to a page to purchase something outside of the configured hours, a message will be displayed to them.

Installing the eStore Opening Hours Addon

You can install this addon the same way you install any WordPress plugin:

  • Go to the “Add New” plugins screen in your WordPress admin area
  • Click the “upload” tab
  • Browse for the addon file (estore-opening-hours.zip)
  • Click “Install Now” and then activate the plugin

Using this Addon

1) In order to configure opening hours for your store, click on the “eStore opening hours” sub-menu under the WP eStore plugin menu.

estore-opening-hours-menu

2) Add opening hours in a 24 hour time format.

estore-opening-hours-configuration

3) Enter the page/post IDs where you want to apply the configured hours.

estore-opening-hours-settings

4) Enter the message that you want to display to the users outside of opening hours.

5) Finally click the “Enable Opening Hours” checkbox.

The addon will not function until you enable this option. This is to make sure that you get some time to configure the hours for your store.

6) Click the Save button

How to Find the Post/Page ID

Each WordPress post or page has a unique ID with it. If your site uses web friendly permalink format, You might not be able to find the ID just by viewing the page. Here is a trick that you can apply to find the ID of a post/page:

1)Go to Pages -> All Pages or Posts -> All Posts.

wordpress-post-id

2) Hover your mouse over the Edit link.

3) The post/page ID should appear on the bottom left corner of your screen (it will be a numeric value).

Get the Opening Hours Addon

The price of this addon is $29

Please contact us to purchase this addon.

WP eStore Addon – Show Purchase Receipts to the Members

This WP eStore extension allows you to show the purchase receipt of members.

You can use a shortcode on a page. The shortcode shows all the purchase receipt(s) of the logged-in member (who is viewing the page).

It lists all the receipts of the member that this member purchases while he/she was logged into the site.

This addon requires the Receipt Creator addon and the WP eMember plugin to function.

WP eStore – Shopping Cart Templates (Full Cart Display Options)

WP eStore plugin comes with a few pre-configured shopping cart display templates. You can use any of these templates (by using a shortcode) to show the shopping cart on your site.

All the cart shortcodes are listed in our shortcodes documentation page.

Shopping Cart Template – Default Option

The following is an example of how the default cart template looks like:

estore-shopping-cart-template-1

Shopping Cart Template – Fancy 1

The following is an example of how the fancy 1 cart template looks like:

estore-shopping-cart-template-2

Shopping Cart Template – Fancy 2

The following is an example of how the fancy 2 cart template looks like:

estore-shopping-cart-template-3

Shopping Cart Template – With Product Thumbnail

The following is an example of how this one looks like:

estore-shopping-cart-template-4

Compact Shopping Cart Templates

In addition to the above full cart templates, the WP eStore plugin comes with a few compact cart shortcodes also.

View the compact cart display options page to learn more about it.

Creating a Specific Cart Checkout Page

This page explains how you can create a specific cart checkout page for your site if you want to.

WP eStore Download Now via Text Link Addon

The eStore Download Now via Text Link addon allows you to use the functionality of the download now button using a simple link (instead of the shortcode).

The free download is served via the standard encrypted download system so the true location of your downloadable file remains hidden.

Installing the eStore Download Now via Text Link Addon

You can install this addon the same way you install any WordPress plugin:

  • Go to the “Add New” plugins screen in your WordPress admin area
  • Click the “upload” tab
  • Browse for the addon file (eStore-download-now-text-link.zip)
  • Click “Install Now” and then activate the plugin

Setup Preparation

It is recommended that you enable the “Enforce Zero Price Checking on Free Product Download” option in the core eStore plugin settings. Then mark the product in question with a $0 price tag. This adds an extra layer of security so your users are only allowed to download items via this feature that are priced at $0.

Using this Addon

When this addon is active, you can add “wp_eStore_download_now” query parameter to your website URL to create a download link.

For example, the following link can be used to offer a free encrypted download of product ID 1:

http://www.example.com/?wp_eStore_download_now=1

Creating an HTML Link

Here is an example code snippet that shows how you can create an HTML link using this functionality:

<a href="http://www.example.com/?wp_eStore_download_now=1">Click Here to Download</a>

Creating an HTML Link with an Image

Here is an example code snippet that shows how you can create an HTML link with an image:

<a href="http://www.example.com/?wp_eStore_download_now=1"><img src="http://www.example.com/url-of-the-image" /></a>

Specifying a Digital Variation in the Link

If your downloadable product contains digital variation, you will need to specify it in the link. For example:

http://www.example.com/?wp_eStore_download_now=1&variation3=standard

Using Download Now with Stamping Option

If you are using the PDF Stamper and WP eMember plugins then you can use the following to create a download now link with stamping option:

http://www.example.com/?wp_eStore_download_now_with_stamping=1

Download the Addon

You can download this addon from here.

General Note

Please note that some of these free eStore addons are developed by our users in the community. So they do not have any advanced customization option. The description above explains exactly what this addon does.

WP eStore TaxCloud Integration AddOn

The eStore TaxCloud addon allows you to integrate your store with taxcloud, a free sales tax management service, to automatically calculate tax for every address in the United States.

TaxCloud handles every aspect of sales tax management, from collecting to filing. It calculates tax in real time for every state, county, city and special jurisdiction in the US.

Installing the eStore TaxCloud Integration Addon

You can install this addon the same way you install any WordPress plugin:

  • Go to the “Add New” plugins screen in your WordPress admin area
  • Click the “upload” tab
  • Browse for the addon file (estore-taxcloud-integration.zip)
  • Click “Install Now” and then activate the plugin

Using this Addon

1) In order to integrate your store with TaxCloud click on the “TaxCloud” sub-menu under the WP eStore plugin menu.

screenshot showing the eStore taxcloud integration addon menu

2) Enter your TaxCloud credentials (API ID & API Key).

screenshot showing the eStore taxcloud addon settings menu

3) Enter your Store Address. TaxCloud requires this information to calculate tax during checkout.

4) Click the Save button

5) Now click on the Verify store address link. This is to make sure that TaxCloud can successfully locate the store address that you have entered. You only need to do it once.

How Does the TaxCloud Integration Addon Work

When a user clicks on the checkout button the addon will redirect the user to a page to collect the destination address.

screenshot showing the taxcloud address collection during checkout

Once the address is submitted, TaxCloud will verify the address and calculate tax based on the origin (Store address) and the destination.

screenshot showing taxcloud checkout process using eStore

After the transaction is processed, the addon will notify TaxCloud that the order has been completed.

International Sales

If you are selling to international customers also then there is an option for those customers to select the “Outside US” option to bypass this.

Get the TaxCloud Integration Addon

The price of this addon is $29

Please contact us to purchase this addon.

Next Page »

Your Shopping Cart

Shopping Cart Empty
Shopping Cart is Empty
Visit The Shop

Search

Featured Documents

Stylish Product Display Options for WP eStore WP eStore Quick Setup and Usage Video Tutorial WP eStore Shortcodes and Functions Reference WordPress eStore Plugin Features WordPress eStore Plugin Demo What Our Customers Have to Say About Our Products WordPress eStore WishList (Feature Suggestions) WordPress eStore Frequently Asked Questions (FAQ) How to Show Add to Cart buttons

Featured Plugins

WP Express Checkout Plugin
wordpress_estore_icon
wordpress membership plugin icon
wordpress_affiliate_plugin_icon

Copyright © 2025 | eCommerce Plugins