Tips and Tricks WP eCommerce

eCommerce Solution for WordPress Blog

  • Home
  • eCommerce Plugins
  • WP eStore Documentation
  • WP Shopping Cart Doc

eStore MadMimi Integration Addon

This addon plugin allow you to integrate WP eStore plugin with the MadMimi Email Marketing solution. You can use it to add customers to your MadMimi email list when someone purchase your product(s).

Installing the MadMimi Integration Addon

You can install this addon the same way you install any WordPress plugin:

  • Go to the Add New plugins screen in your WordPress admin area
  • Click the upload tab
  • Browse for the plugin file (eStore-madmimi-integration-addon.zip)
  • Click Install Now and then activate the plugin

Using the MadMimi Integration AddOn

After you install this addon using the above instruction do the following:
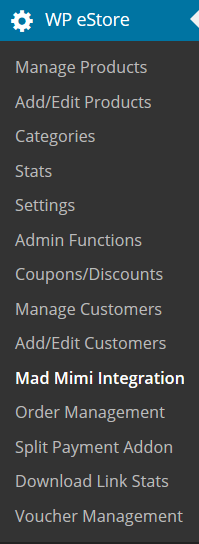
Step 1) Go to the MadMimi integration settings interface from your main eStore menu.

mad-mimi-integration-menu

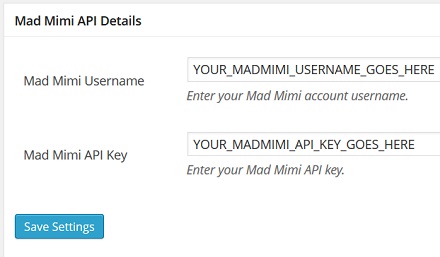
Step 2) Fill in the MadMimi Account Details

mad-mimi-integration-api-details

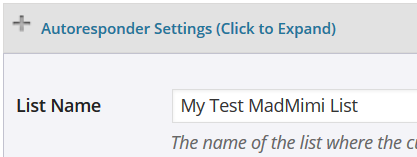
Step 3) Edit the eStore product (the one that you want to link to MadMimi list) and specify the list name in the List Name field.

mad-mimi-integration-list-name

Save the product and you are done!

Now every time  there is a new transaction or squeeze page form submission for this product, the customer will be automatically added to your MadMimi list.

AddOn Price

The MadMimi Integration Addon is FREE for all customers who purchased WP eStore plugin from us.

Download the Addon (v1.3)

You can download this addon from the addon download area of our customer only support forum.

WP eStore and MemberWing Plugin Integration

WP eStore can be integrated with the MemberWing Plugin.

MemberWing Plugin Integration Steps

Step 1: You will need one piece of information from the MemberWing plugin. So browse to the “Integration with other systems” menu from the “MemberWing-X” section of your WordPress Dashboard:

Admin dashboard => MemberWing-X => Integration with other systems

Step 2: Copy the URL from “MemberWing Universal Paypal Postback URL” field. It will look something like the following:

http://www.your-domain.com/wp-content/plugins/memberwing-x/mwx-notify-paypal.php?mwx_api_key=dfb0e9e3b9359541&skip_postback=1

Step 3: Browse to the “3rd Party Integration” tab from the WP eStore’s settings menu and paste the above URL in the “MemberWing Integration Settings” section:

MemberWing Plugin Integration

All done, now when someone makes a purchase using a payment button configured using eStore, it will automatically create a membership account for that customer.

WordPress eStore and WishList Members plugin Integration

Integrating WishList with the WP eStore plugin is very easy. First you should read the integration scenario post from the following URL to get a visualization of what to expect from this integration though:

  • WP eStore and WishList integration scenerio

You also need to make sure that you have the latest version of WishList Members pluign. Move to the next section when you are ready to do the integration.

What Info will You Need?

You will need 3 pieces of information from WishList members plugin to configure a “Buy Now”, “Subscribe” or “Add to Cart” button that integrates with the WP eStore plugin. The info you need  are:

  1. The Post URL
  2. The Secret Word
  3. Membership Level SKU Number

All these information can be found on the “Integration” tab of the WishList members plugin (Select Generic System integration)

wishlist-members-generic-integration-menu

WP eStore Settings for WishList Members Integration

Step 1) Go to the “3rd Party Integration” tab from the settings menu of WP eStore plugin.

esotre-and-wishlist-members-integration-settings

Step 2) Check the “Enable Wishlist Members Integration” checkbox from the “WishList Integration Settings” section.

Step 3) Fill in the “POST URL” and the “Secret Word” in the corresponding fields and save the settings by clicking the “Update” button.

Step 4) When configuring an eStore product, use the Membership Level SKU (this is number that corresponds to a particular membership level of your WishList members plugin) in the “Reference Text” field under the Additional product details section of the product.

Now, when someone pays using that eStore product, the plugin will know which membership level to create for that user. Once the user makes a payment, the plugin will talk to the WishList members plugin to create a membership account and send an email which will have a link to complete the registration.

Handling the Thank You Page URL

The user needs to click on the unique link sent to them via email in order to complete the registration after payment. So you can send the users to a generic “Thank You” page (after payment) where you instruct them to check the email for the special registration link and click on it.

What to Do When You Have Multiple Membership Levels?

Create a new eStore product for each of your membership levels and use the corresponding SKU value of the level in the reference text field of the eStore product.

« Previous Page

Your Shopping Cart

Shopping Cart Empty
Shopping Cart is Empty
Visit The Shop

Search

Featured Documents

Stylish Product Display Options for WP eStore WP eStore Quick Setup and Usage Video Tutorial WP eStore Shortcodes and Functions Reference WordPress eStore Plugin Features WordPress eStore Plugin Demo What Our Customers Have to Say About Our Products WordPress eStore WishList (Feature Suggestions) WordPress eStore Frequently Asked Questions (FAQ) How to Show Add to Cart buttons

Featured Plugins

WP Express Checkout Plugin
wordpress_estore_icon
wordpress membership plugin icon
wordpress_affiliate_plugin_icon

Copyright © 2025 | eCommerce Plugins