Tips and Tricks WP eCommerce

eCommerce Solution for WordPress Blog

  • Home
  • eCommerce Plugins
  • WP eStore Documentation
  • WP Shopping Cart Doc

Enabling PayPal Smart Button Checkout – Setup and Configuration

Note: PayPal has deprecated the Smart Checkout feature. Switch to using the PayPal Commerce Platform (new API) which replaces the Smart Checkout option.


The PayPal Smart Checkout is an option you can enable in your WP Simple Cart Plugin. The Smart Checkout Button provides your customers with an alternative checkout method. The PayPal Smart Button Checkout contains a number of buttons that allow your customers to checkout using their PayPal Account, their credit card (Visa, Mastercard), Buy Now Pay Later or PayPal credit.

The checkout form is displayed to the customer in a popup window.

smart-paypal-checkout

Checkout Demo Video

The following video shows how a checkout works with PayPal smart button (from a customers point of view):

Configuring PayPal Smart Checkout Button

Step 1) Ensure you have the latest version of the WP Simple PayPal Shopping Cart Plugin installed and activated on your WordPress site.

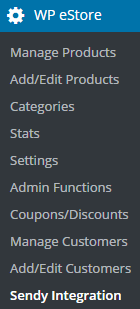
Step 2) Click on the Settings menu under Simple Cart.

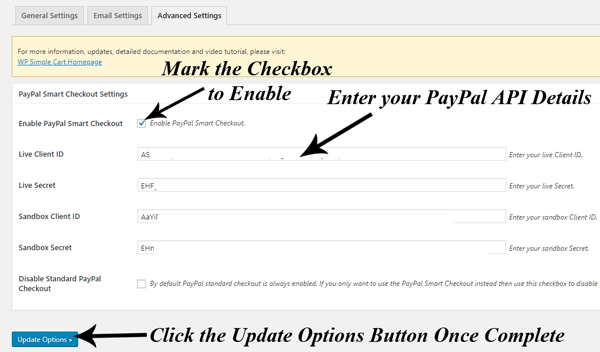
Step 3) Choose the Advanced Settings tab.

Step 4) You will now see a section titled PayPal Smart Checkout Settings.

Step 5) Mark the checkbox next to Enable PayPal Smart Checkout.

paypal-smart-button-configuration

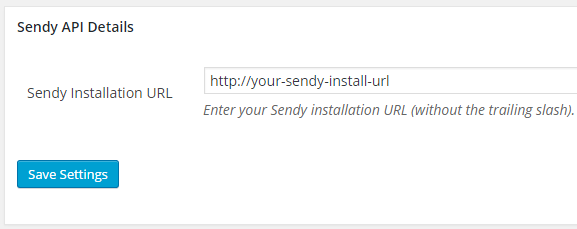
Step 6) To set up this feature you will now need to Log in to your PayPal Developer Account to locate your API details. You will need a PayPal Business Account.

Step 7) Click on the My Apps & Credentials menu within your PayPal Developer Account.

Step 8) Scroll down to the Rest API Apps section.

Step 9) Click the Create App button.

Step 10) Give your app a name that relates to it’s intended use.

Step 11) Click the Create App button.

Step 12) You will now see your Sandbox Client ID and your Sandbox Secret Key (once you click the ‘show’ button).

Step 13) Click the Live button in the left hand corner to show your Live API Keys.

configuring-paypal-smart-button-wordpress

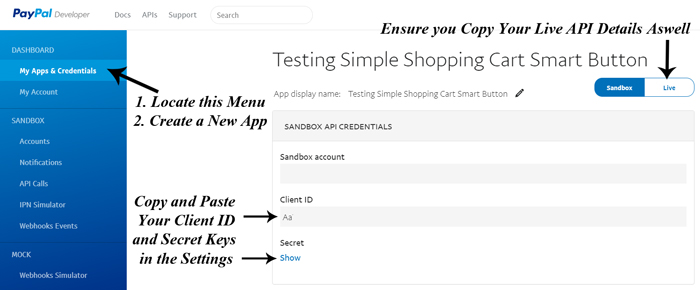
Step 14) Copy and paste both your Live and Test Client ID’s and your Live and Test Secret Keys from your PayPal account into the settings menu of your WP PayPal Shopping Cart. Ensure you paste them in the correct fields.

Step 15) If you would only like to offer Smart PayPal Checkout, mark the checkbox next to Disable Standard PayPal Checkout. Alternatively, you can choose to offer both at once by leaving this box unmarked.

Step 15) Click the Update Options button. You have now completed the setting configuration for PayPal Smart Checkout.

Step 16) Your Simple PayPal Shopping Cart Products will now be able to be purchased through this PayPal checkout method.

Purchasing a Product via PayPal Smart Checkout

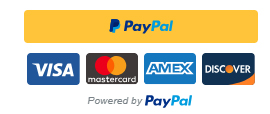
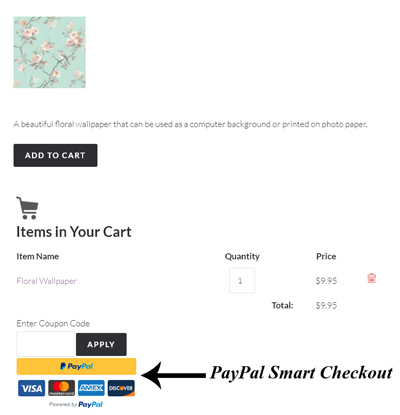
A customer can add an item to your Simple PayPal Shopping Cart. Once the item appears in the cart, the customer can go ahead and checkout using PayPal Smart Checkout. They can click the button that applies to them.

For example, in the following example, the customer clicks the PayPal button because they wish to pay directly from their PayPal account.

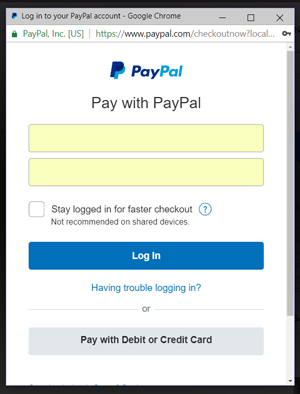
Once a customer clicks on one of the PayPal Smart Checkout buttons, a popup appears where they can complete the checkout process by entering in the appropriate details.

paypal-smart-checkout-product
paypal-smart-checkout-popup

Customizing the Smart Checkout Buttons

Read our documentation on smart checkout buttons customization.

PayPal’s Pay In 4 (Buy Now Pay Later Option)

Read our PayPal’s buy now pay later documentation to learn more about it.

WP eStore and ConvertKit Integration Addon

You can integrate the WP eStore plugin with Convertkit so that the customers can be automatically added to your ConvertKit sequence.

The users are added to the ConvertKit sequence when any of the following event happens:

  1. A customer purchases a product that has a ConvertKit sequence specified for it.
  2. A visitor submits a squeeze form for a product that has a ConvertKit sequence specified for it.

Installing the ConvertKit Addon

You can install this addon the same way you install any WordPress plugin:

  • Go to the Add New plugins screen in your WordPress admin area
  • Click the Upload button
  • Browse for the addon file (estore-convertkit-addon.zip)
  • Click Install Now and then activate the plugin

Addon Usage

Step 1) Click on the ConvertKit menu link from the main eStore plugin’s admin menu.

Step 2) Enable the integration then fill in the API key details. You can get the API details from your ConvertKit account.

Step 3) Edit the eStore product in question and specify your ConvertKit Sequence Name in the List Name field of the product.

Example value: my-cv-sequence

autoresponder-list-name-in-product

Get the ConvertKit Addon

The price of this addon is $39

WP eStore – Amazon S3 Integration Addon

The Amazon S3 Integration addon allows you to securely store and deliver digital downloads using Amazon’s Simple Storage Service (S3).

You can serve the private/protected files from your amazon S3 account using this addon.

Table of Contents

  • Minimum Requirement
  • Download the Addon
  • Installing the eStore S3 Integration Addon
  • Using the WP eStore S3 Addon
    • Step 1) Enter Your Amazon S3 API Details
    • Step 2) Enter the File/Object Link in eStore Product
  • Testing Encrypted Download from Amazon S3
  • What File Permission To Use in Amazon S3
  • Force File Downloads Instead of Opening in the Browser
  • Important Notes
[Read more…]

WP eStore and ActiveCampaign Integration Addon

You can integrate the eStore plugin with ActiveCampaign autoresponder so that the customers can be automatically signed up to your ActiveCampaign list (with any tags that you want to apply).

The users are added to the ActiveCampaign list when any of the following event happens:

  1. A customer purchases a product that has an ActiveCampaign list ID specified for it.
  2. A visitor submits a squeeze form for a product that has an ActiveCampaign list ID specified for it.

Installing the ActiveCampaign Addon

You can install this addon the same way you install any WordPress plugin:

  • Go to the Add New plugins screen in your WordPress admin area
  • Click the Upload button
  • Browse for the addon file (estore-active-campaign-addon.zip)
  • Click Install Now and then activate the plugin

Addon Usage

Step 1) Click on the ActiveCampaign menu link from the main eStore plugin’s admin menu.

Step 2) Enable the integration then fill in the API key and API URL details. Then hit the “update” button to save.

You can get the API details from your ActiveCampaign account.

Step 3) You need to get the List ID of the list where you want to add the users.

Getting the List ID value of Your ActiveCampaign List

If you select the list and look in the URL you should see the list id there:

activecampaign-list-id-value

Edit the eStore product in question and specify your ActiveCampaign List ID in the List Name field of the product. Example value: 2

autoresponder-generic-list-id-tag-id-setup

The addon will add the customer to this list.

Specifying Tags (Optional)

Optionally, you can specify tags together with the list ID value. Lets say the list ID is 2 and you want to apply tags “tag1”, “tag2” and “tag3”. You would enter the list ID and tags using the following format:

2|tag1,tag2,tag3

Get the ActiveCampaign Addon

The price of this addon is $29.95

Simple Shopping Cart – Adding Extra PayPal Input Fields

The simple shopping cart plugin has a filter that you can use to add extra input fields that will get sent to PayPal as part of the checkout.

Code Example

The following code example shows how you can append extra fields to the checkout form (add this code to your theme’s functions.php file or a custom plugin).

It will add the language code field to force a specific language on the PayPal checkout page.

add_filter('wspsc_cart_extra_paypal_fields', 'append_extra_fields');
function append_extra_fields($output)
{
    //Add the PayPal language code field
    $output = '<input name="lc" type="hidden" value="US" />';
    return $output;
}

WP eStore and Constant Contact Integration Addon

This addon has been deprecated. It is no longer being sold.

The users are added to the Constant Contact list when any of the following event happens:

  1. A customer purchases a product that has a list name specified for it.
  2. A visitor submits a squeeze form for a product that has a list name specified for it.

Installing the Constant Contact Addon

You can install this addon the same way you install any WordPress plugin:

  • Go to the Add New plugins screen in your WordPress admin area
  • Click the Upload button
  • Browse for the addon file (estore-constant-contact-addon.zip)
  • Click Install Now and then activate the plugin

Addon Usage

Step 1) Click on the “Constant Contact” menu link from the main eStore plugin’s admin menu.

Step 2) Enable the integration then fill in the API key and other API details. Then hit the “update” button to save.

You can get the API details from your Constant Contact account.

Step 3) Edit the eStore product in question and specify your Constant Contact “List Name” in the List Name field of the product.

Now, when a customer purchase this product, the addon will automatically add this user to the specified list.

WP eStore Sendy Integration Addon

This addon plugin allow you to integrate WP eStore plugin with the Sendy Email Marketing solution. You can use it to add customers to your Sendy email list when someone purchase your product(s).

Installing the Sendy Integration Addon

You can install this addon the same way you install any WordPress plugin:

  • Go to the “Add New” plugins screen in your WordPress admin area
  • Click the “upload” tab
  • Browse for the plugin file (eStore-sendy-integration-addon.zip)
  • Click “Install Now” and then activate the plugin

Using the Sendy Integration AddOn

After you install this addon using the above instruction do the following:

Step 1) Go to the Sendy integration settings interface from your main eStore menu.

screenshot of sendy integration menu in the estore plugin

Step 2) Enter you Sendy Installation URL.

screenshot showing the sendy api details section in the estore plugin

Step 3) Edit the eStore product (the one that you want to link to Sendy list) and specify the list ID in the List Name field.

screenshot of sendy autoresponder section in the estore product interface

Save the product and you are done!

Now every time  there is a new transaction or squeeze page form submission for this product, the customer will be automatically added to your Sendy list.

How to Get The Sendy Integration Addon/Extension

The price of this addon is $29.95

Please contact us to purchase this addon.

Automatically Shorten Encrypted Download Links in WP eStore Plugin

WP eStore plugin allows you to shorten the encrypted download links using Bitly URL shortener service. In order to integrate Bitly with eStore please follow these steps:

Step 1 (Login to Bitly)

Login to your Bitly account (Please sign up for an account if you don’t have one).

Step 2 (Generate token)

Generate a generic access token here by confirming your account password at the bottom of the page.

Step 3 (Enable Bitly in eStore)

  • Go to eStore general settings (WP eStore->Settings->Digital Product Delivery Settings)
  • Enable Shorten Encrypted Download Links
  • Enter your Bitly access token and save the settings.

shorten-encrypted-download-links-settings

Jrox Jam Affiliate Software Integration Addon

You can integrate the eStore plugin with Jrox Jam Affiliate software using this addon plugin. It allows you to track and generate commission for the customers that are referred by your affiliates.

Installing the Jam Affiliate Integration Addon

You can install this addon the same way you install any WordPress plugin:

  • Go to the “Add New” plugins screen in your WordPress admin area
  • Click the “upload” tab
  • Browse for the addon file (estore-jrox-jam-affiliate-integration.zip)
  • Click “Install Now” and then activate the plugin

Addon Usage

Step 1) Click on the “Jrox Jam Affiliate” menu link from the main eStore plugin’s admin menu.

Step 2) Specify the URL of the “sale.php” file of your Jrox JAM affiliate install.

jrox-jam-affiliate-integration-settings

Get the Jam Affiliate Integration Addon

The price of this addon is $29.95

Please contact us to purchase this addon.

WP eStore and Infusionsoft Integration Addon

You can integrate the eStore plugin with Infusionsoft so that the customers can be automatically signed up to your Infusionsoft list.

Installing the Infusionsoft Integration Addon

You can install this addon the same way you install any WordPress plugin:

  • Go to the “Add New” plugins screen in your WordPress admin area
  • Click the “upload” tab
  • Browse for the addon file (estore-infusionsoft-addon.zip)
  • Click “Install Now” and then activate the plugin

Addon Usage

Step 1) Click on the “Infusionsoft” menu link from the main eStore plugin’s admin menu.

Step 2) Enable the integration then fill in the API key and your APP Name. Then hit the “update” button to save.

infusionsoft-integration-settings

API Key – You can get the API key from your Infusionsoft account.

APP Name – The appname is the subdomain value of your account URL. For example, if your Infusionsoft account URL is the following:

https://az127.infusionsoft.com/Admin/home.jsp

Then your app name is az127

Step 3) Edit the eStore product in question and specify your Infusionsoft “Tag ID” in the List Name field of the product.

specifying-infusionsoft-tag-id

Now, when a customer purchase this product, the addon will automatically add this user to the specified Infusionsoft tag.

Getting Infusionsoft Tag ID

You can find all your Infusionsoft tags (they used to be called “groups”) from the tags interface of your Infusionsoft account.

getting-Infusionsoft-tag-id

Get the eStore Infusionsoft Addon

The price of this addon is $29.95

Next Page »

Your Shopping Cart

Shopping Cart Empty
Shopping Cart is Empty
Visit The Shop

Search

Featured Documents

Stylish Product Display Options for WP eStore WP eStore Quick Setup and Usage Video Tutorial WP eStore Shortcodes and Functions Reference WordPress eStore Plugin Features WordPress eStore Plugin Demo What Our Customers Have to Say About Our Products WordPress eStore WishList (Feature Suggestions) WordPress eStore Frequently Asked Questions (FAQ) How to Show Add to Cart buttons

Featured Plugins

WP Express Checkout Plugin
wordpress_estore_icon
wordpress membership plugin icon
wordpress_affiliate_plugin_icon

Copyright © 2025 | eCommerce Plugins