Tips and Tricks WP eCommerce

eCommerce Solution for WordPress Blog

  • Home
  • eCommerce Plugins
  • WP eStore Documentation
  • WP Shopping Cart Doc

Google Analytics E-Commerce Tracking Addon for eStore Plugin

google-analytics-ecommerce-tracking-addon-thumbnail

Note: This is not for GA4.

The Google Analytics E-Commerce Tracking addon allows you to do ecommerce tracking without needing any another analytics plugin.

You just have to activate this addon and configure some Google Analytics API details and you are all set.

This addon uses universal tracking so the user doesn’t even have to come back to the thank you page for it to work.

google-analytics-ecommerce-tracking

E-Commerce Tracking Usage Instructions

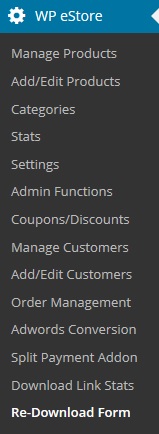
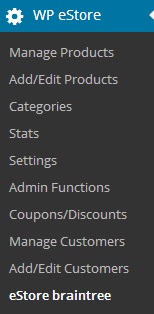
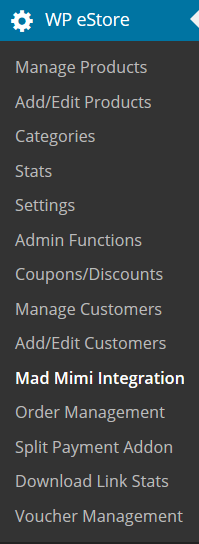
1) Once you have installed the addon Go to WP eStore->eCommerce Tracking.

screenshot showing the eStore google analytics tracking addon menu

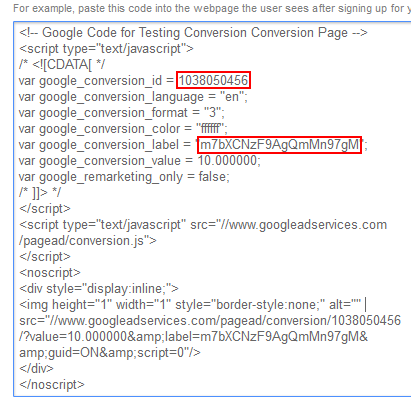
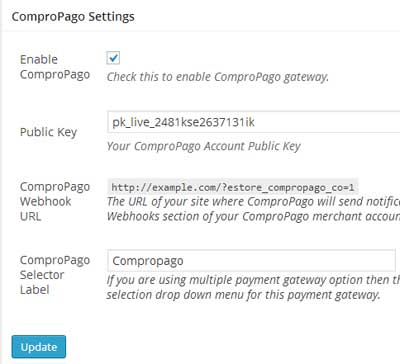
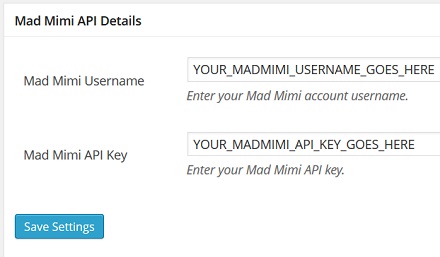
2) Enter your Google Analytics Tracking ID.

screenshot showing the eStore google analytics tracking addon settings

3) Save the settings.

Download E-Commerce Tracking Addon

You can download this addon by clicking here.

How to Use Pay What You Want Price for Your Product

In this tutorial I will explain how you can charge a “Pay What You Want Price” to sell your products.

There is an option in the eStore that allows you to make products where customers can choose what they want to pay you for a product.

How to Setup the “Pay What You Want” Feature

Step 1: Create a product as you would normally do.

Step 2: Specify the minimum amount you want your customers to pay in the “Price” field for this product. Example: $5.00

Step 3: In the product settings under “Additional Product Details” section, check the following option:

pay what you want price

Now, when you put the “Add to Cart” button on the page for this product, it will have an option to enter a custom price field next to the button. This will allow the customer to specify how much they want to pay for this product. Example Below:

pay-what-you-want-price-example

Using Pay What You Want Price with a Display Template

If you want to use a fancy display template with this feature, it will look like the following:

Customer Specifies a Price Demo
This is a test description. This description is here to show how the description of this product looks like.
Price: $2.00
Your Price: $ 

Adwords Conversion Tracking AddOn for Your Store

If you run Google Adwords campaigns and you want to know which of your keywords best leads to clicks and conversions, such as sales, conversion tracking can help you. The conversion tracking tool in AdWords can show you what happens after customers click your ad (for example, whether they purchased your product or not).

The eStore conversion tracking addon plugin adds conversion tracking functionality to your store.

Installing the Conversion Tracking Addon

You can install this addon the same way you install any WordPress plugin:

  • Go to the “Add New” plugins screen in your WordPress admin area
  • Click the “upload” tab
  • Browse for the addon file (estore-adwords-conversion-tracking.zip)
  • Click “Install Now” and then activate the plugin

Using This Addon

After you active this addon, You need to configure some settings related to this addon.

Click on the “Adwords Conversion” sub-menu under the eStore plugin’s admin menu.

You need the following two pieces of information from your Google Adwords account:

  1. Conversion Label
  2. Conversion ID

Follow this tutorial to get your conversion tracking code.

Your conversion tracking code should look like the following (the two pieces of information you need from this code is highlighted):

getting-adwords-conversion-id-and-label-values

Once you have the “Conversion Label and “Conversion ID” values, enter them in the settings of this addon:

adwords-conversion-tracking-settings

Save the settings and your store will start to do the conversion tracking.

Download the Addon (v1.0)

You can download this addon from the addon download area of our support forum.

Please note that some of these free eStore addons are developed by our users in the community. So they do not have any advanced customization option. The description above explains exactly what this addon does.

Apply a Discount or Coupon Code to the Cart via a URL or Link

WP eStore plugin has a feature to apply a discount code via the URL.

Step 1) First, you need to install the extra shortcodes addon (if you haven’t done it already)

Step 2) Now, you can append the following query argument to the end of an URL to create a link that will apply the discount code in the shopping cart:

?discount_code=COUPONCODE

Lets say for example, the WP eStore shopping cart is on the “http://www.example.com/cart” page, then the URL with the discount code will be the following:

http://www.example.com/cart/?discount_code=COUPONCODE

When you create a link using the above URL, it will apply the discount in the cart.

apply-discount-coupon-code-via-url-example

Add Item to the Cart and Apply Discount At the Same Time

Sometimes you may want to add an item to the shopping cart via a link and then apply a discount to the cart at the same time. You can do that by specifying the discount code in the URL when using the purchase product via link feature.

When you do this, the customer clicking on the call to action link will see that the item is added to the cart with a discount applied to it.

You can learn how to use this feature here.

WP eStore Addon – Self Re-Download Digital Products

This eStore addon allows your customers to re-download the digital products they purchased via a page on your site.

This can be used if you want your customers to be able to download the latest version of a digital product by visiting a page on your site and filling out a form.

self-re-download-digital-products-form-screenshot

Installing the Self Re-Download Products Addon

You can install this addon the same way you install any WordPress plugin:

  • Go to the “Add New” plugins screen in your WordPress admin area
  • Click the “upload” tab
  • Browse for the addon file (estore-redownload-purchased-items.zip)
  • Click “Install Now” and then activate the plugin

Using this Addon

When this addon is active, You can configure some settings related to this addon. To configure this addon, click on the “Re-Download Form” sub-menu under the WP eStore plugin admin menu.

self-re-download-digital-products-addon-menu

Step 1) Create a new WordPress page where you want to offer this product re-download option.

Step 2) Add the following shortcode to this newly created page:

[eStore_product_download_form]

Step 3) Select this page from the settings interface of this addon.

You can optionally enable captcha on this digital product re-download form.

Now, your customers can go this page and enter some details (to verify their purchase) and re-download the digital items they purchased from you in the past.

AddOn Price

The Self Re-Download Digital Items Addon is FREE

Download the Addon (v1.1)

You can download this addon from the addon download area of our customer only support forum.

Please note that some of these free eStore addons are developed by our users in the community. So they do not have any advanced customization option. The description above explains exactly what this addon does.

WP eStore Addon – ComproPago Payment Gateway

This addon allows you to do shopping cart checkout using ComproPago payment gateway.

AddOn Price

The eStore ComproPago addon is FREE for all customers who purchased WP eStore plugin from us.

Download the Addon

You can download this addon from the gateway addon download area of our support forum.

Installation

You can install this addon the same way you install any WordPress plugin:

  • Go to the “Add New” plugins screen in your WordPress admin area
  • Click the “upload” tab
  • Browse for the addon file (eStore-compropago-gateway.zip)
  • Click “Install Now” and then activate the plugin

Using ComproPago Payment Gateway Addon

Once you install addon you will need to configure some ComproPago specific settings. You can find the settings page under the eStore ComproPago menu of WP eStore plugin. The following screenshot shows how you can access the settings page of this addon:

screenshot showing how to access the ComproPago addon in the estore settings

In order to complete the settings simply follow the steps outlined below:

Step 1: Enable “ComproPago” from the settings section of the addon.

Step 2: Enter your ComproPago merchant account Public Key. You can retrieve it by logging into your ComproPago account and clicking “Configuration”.

screenshot showing the settings menu for ComproPago addon

Step 3: Copy the webhook URL for your site and specify it in your ComproPago Merchant account. ComproPago will send notification to this URL when a transaction is processed.

screenshot showing how to configure a webhook in your ComproPago merchant account

Step 4: Enter your preferred checkout text for ComproPago gateway (example: ComproPago). This text will be used in the eStore shopping cart gateway selection drop down menu if you are using multiple payment gateway options.

Now hit the Update button and your site will be ready to accept payments using ComproPago gateway.

WP eStore Bulk Quantity Shipping AddOn

The eStore Bulk Quantity Shipping addon allows the shopping cart to automatically apply a shipping amount based on the number of items a user is purchasing.

You can pre-configure how much shipping to apply for which item quantity range.

How Does the Bulk Shipping Condition Work

Lets say, you configured one shipping condition and a user just came to your site to do a shopping cart checkout. If the user adds 7-9 items to the shopping cart, a $20 shipping will be automatically applied to the cart.

Installing the eStore Bulk Quantity Shipping Addon

You can install this addon the same way you install any WordPress plugin:

  • Go to the “Add New” plugins screen in your WordPress admin area
  • Click the “upload” tab
  • Browse for the addon file (eStore-bulk-qty-shipping.zip)
  • Click “Install Now” and then activate the plugin

Using this Addon

When this addon is active, You can easily configure some conditions that will be used to automatically apply the shipping amount on the shopping cart.

To configure a new shipping condition click on the “eStore bulk shipping” sub-menu under the WP eStore plugin menu.

screenshot showing how to access the estore bulk quantity shipping addon menu

To add a new condition you need to enter the following information:

  • From (Quantity): The minimum number of items required to apply this shipping amount. For example: 7
  • To (Quantity): The maximum number of items required in the shopping cart to apply this shipping amount. For example: 9
  • Shipping Amount: The shipping amount that will be applied to the cart when the above condition is fulfilled. For example: 20

Click the “Save” button which will add the new shipping condition.

You can add as many conditions as you want.

screenshot showing how to configure a bulk quantity shipping condition

Marking a Product to be a Physical Item

The bulk quantity shipping addon can override and apply the bulk shipping amount to the cart, if the product in question is a physical item. The way to mark a product to be a physical item is to add a shipping amount of 0.01 to the shipping cost of the item. So edit the WP eStore product in question and enter a value of 0.01 to the Item Shipping Cost field.

AddOn Price

The eStore Bulk Quantity Shipping Addon is FREE for all customers who purchased WP eStore plugin from us.

Download the Addon

You can download this addon from the addon download area of our customer only support forum.

General Note

Please note that some of these free eStore addons are developed by our users in the community. So they do not have any advanced customization option. The description above explains exactly what this addon does.

WP eStore Addon – Braintree Payment Gateway

This addon allows you to do shopping cart checkout using Braintree payment gateway.

AddOn Price

The eStore Braintree addon is FREE for all customers who purchased WP eStore plugin from us.

Download the Addon

You can download this addon from the gateway addon download area of our support forum.

Installation

You can install this addon the same way you install any WordPress plugin:

  • Go to the “Add New” plugins screen in your WordPress admin area
  • Click the “upload” tab
  • Browse for the addon file (eStore-braintree-gateway.zip)
  • Click “Install Now” and then activate the plugin

Using Braintree Payment Gateway Addon

Once you install addon you will need to configure some Braintree specific settings. You can find the settings page under the eStore braintree menu of WP eStore plugin. The following screenshot shows how you can access the settings page of this addon:

screenshot showing how to access the braintree addon in the estore settings

In order to complete the settings simply follow the steps outlined below:

Step 1: Enable “Braintree” from the settings section of the addon.

Step 2: Enter your Braintree merchant account credentials (Merchant ID, Public Key, Private Key, CSE Key). You can retrieve them by logging into your Braintree account and clicking “Account->My User->API Keys”.

screenshot showing the settings menu for braintree addon

Step 3: Enter your preferred checkout text for Braintree gateway (example: Braintree). This text will be used in the eStore shopping cart gateway selection drop down menu if you are using multiple payment gateway options.

Step 4: Enter a title for the order information page. This page will be used to collect order information from your users.

Now hit the Update button and your site will be ready to accept payments using braintree gateway.

Download the Addon

You can download this addon from the gateway addon download area of our support forum.

eStore MadMimi Integration Addon

This addon plugin allow you to integrate WP eStore plugin with the MadMimi Email Marketing solution. You can use it to add customers to your MadMimi email list when someone purchase your product(s).

Installing the MadMimi Integration Addon

You can install this addon the same way you install any WordPress plugin:

  • Go to the Add New plugins screen in your WordPress admin area
  • Click the upload tab
  • Browse for the plugin file (eStore-madmimi-integration-addon.zip)
  • Click Install Now and then activate the plugin

Using the MadMimi Integration AddOn

After you install this addon using the above instruction do the following:

Step 1) Go to the MadMimi integration settings interface from your main eStore menu.

mad-mimi-integration-menu

Step 2) Fill in the MadMimi Account Details

mad-mimi-integration-api-details

Step 3) Edit the eStore product (the one that you want to link to MadMimi list) and specify the list name in the List Name field.

mad-mimi-integration-list-name

Save the product and you are done!

Now every time  there is a new transaction or squeeze page form submission for this product, the customer will be automatically added to your MadMimi list.

AddOn Price

The MadMimi Integration Addon is FREE for all customers who purchased WP eStore plugin from us.

Download the Addon (v1.3)

You can download this addon from the addon download area of our customer only support forum.

Sell Birthday Greetings – eStore Addon

You can sell birthday greetings with this addon.

It lets your customers enter a message and a recipient’s email address then they purchase the gift item. The digital gift item (a birthday greeting video, audio, PDF etc) is delivered to the recipient with the message after the transaction.

sell-birthday-greetings-example

Usage

Lets say you want to sell a birthday gift item which you have configured in the eStore plugin. The ID of this eStore product is 1.

You can add the following shortcode to a WordPress page that will let your customers buy this item and specify a recipient’s email address and a special message:

[eStore_birthday_greeting id=”1″]

Get the Gift Voucher Addon

The price of this addon is $30.00

Please contact us to purchase this addon.

« Previous Page
Next Page »

Your Shopping Cart

Shopping Cart Empty
Shopping Cart is Empty
Visit The Shop

Search

Featured Documents

Stylish Product Display Options for WP eStore WP eStore Quick Setup and Usage Video Tutorial WP eStore Shortcodes and Functions Reference WordPress eStore Plugin Features WordPress eStore Plugin Demo What Our Customers Have to Say About Our Products WordPress eStore WishList (Feature Suggestions) WordPress eStore Frequently Asked Questions (FAQ) How to Show Add to Cart buttons

Featured Plugins

WP Express Checkout Plugin
wordpress_estore_icon
wordpress membership plugin icon
wordpress_affiliate_plugin_icon

Copyright © 2025 | eCommerce Plugins