Tips and Tricks WP eCommerce

eCommerce Solution for WordPress Blog

  • Home
  • eCommerce Plugins
  • WP eStore Documentation
  • WP Shopping Cart Doc

How to Customize Smart Checkout Buttons – WP Shopping Cart

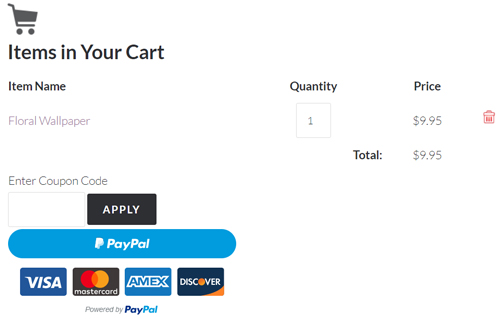
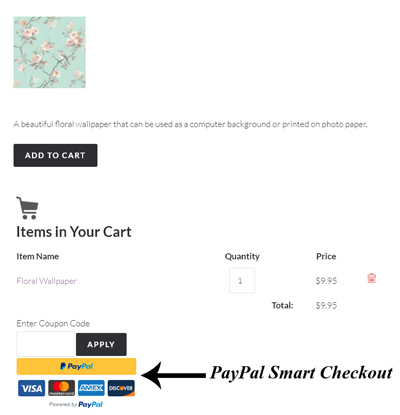
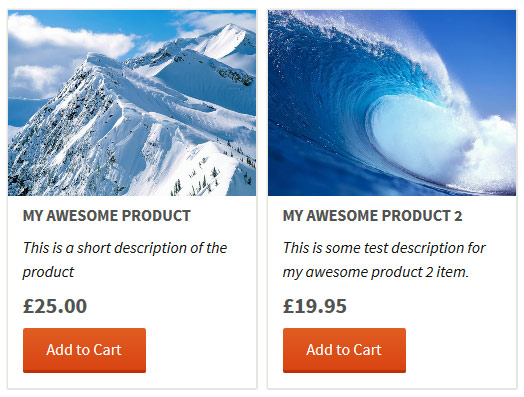
Once you have configured the PayPal Smart Button Checkout for the WP Simple Shopping Cart Plugin you can customize the checkout button appearance. The customization tools for the smart button checkout enable you to create a visually appearing payment area for your potential customers. Use the Size, Color, Shape and Layout tools to create a customized checkout button.

Customizing the Look of Your PayPal Smart Button Checkout
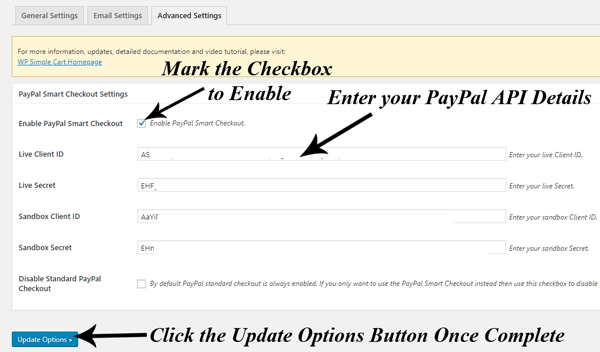
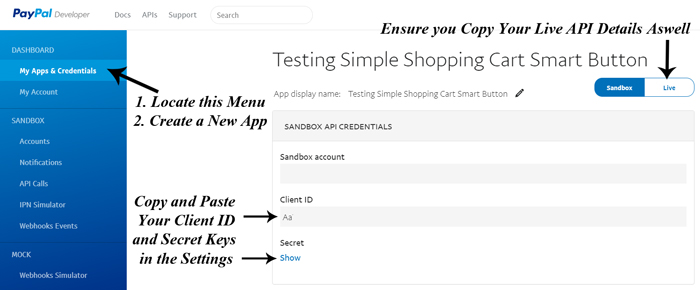
Step 1) Ensure you have completed the configuration needed for PayPal Smart Checkout.

Step 2) Click on the Settings menu under Simple Cart.

Step 3) Choose the Advanced Settings tab. You will now see a number of customization tools.

customization-smart-button-settings

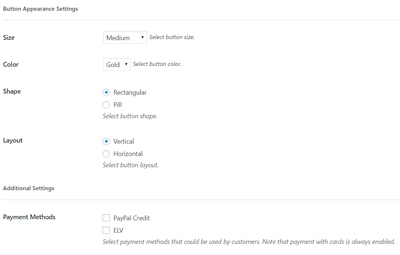
Step 4) Choose the Size of your PayPal Smart Checkout button by clicking the drop-down menu. The options are Medium, Large or Responsive (meaning it will change depending on the device it is viewed on).

Step 5) Choose the Color of your Smart Checkout button by clicking on the drop-down menu. The color choices include: Gold, Blue, Silver or Black.

black-smart-button-checkout

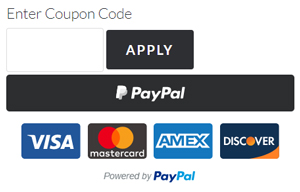
Black Smart Button Checkout

blue-smart-button-checkout

Blue Smart Button Checkout

silver-smart-button-checkout

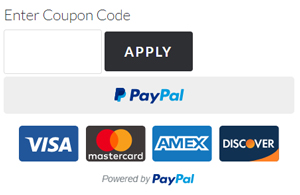
Silver Smart Button Checkout

Step 6) Choose the Shape of your Smart Checkout button. Mark the option next to either Rectangular or Pill.

rectangular-smart-checkout-wp-simple-cart

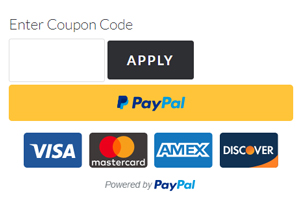
Rectangular Smart Button Checkout

pill-smart-button-checkout

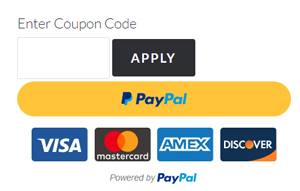
Pill Smart Button Checkout

Step 7) Choose the Layout of your Smart Checkout button. Mark the option next to either Vertical or Horizontal.

Step 7) Choose if you’d like to allow your customers to use PayPal Credit or ELV to pay for your products or services. Mark the checkbox next to either of the options to allow them on your Smart Checkout.

PayPal Credit: This is a means of payment where the customer pays off their purchase with PayPal over time.

ELV: Standing for Elektronisches Lastschriftverfahren, ELV is a popular payment method in Germany. It allows the customer to pay via their bank account.

Step 8) Ensure you Update Options to save the customization changes you have made.

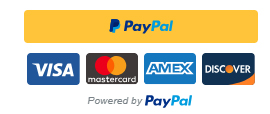
Customized PayPal Smart Button

Using the customization tools for PayPal Smart Buttons, you can create a checkout that matches the theme of your website.

cart-with-smart-button-checkout

Filed Under: WordPress Shopping Cart Tagged With: e-commerce, paypal, PayPal Smart Checkout, PayPal Smart Checkout Buttons, WP Shopping Cart

Enabling PayPal Smart Button Checkout – Setup and Configuration

The PayPal  Smart Checkout is an option you can enable in your WP Simple Cart Plugin. The Smart Checkout Button provides your customers with an alternative checkout method. The PayPal Smart Button Checkout contains a number of buttons that allow your customers to checkout using their PayPal Account, their credit card (Visa, Mastercard), Buy Now Pay Later or PayPal credit.

The checkout form is displayed to the customer in a popup window.

smart-paypal-checkout

Checkout Demo Video

The following video shows how a checkout works with PayPal smart button (from a customers point of view):

Configuring PayPal Smart Checkout Button

Step 1) Ensure you have the latest version of the WP Simple PayPal Shopping Cart Plugin installed and activated on your WordPress site.

Step 2) Click on the Settings menu under Simple Cart.

Step 3) Choose the Advanced Settings tab.

Step 4) You will now see a section titled PayPal Smart Checkout Settings.

Step 5) Mark the checkbox next to Enable PayPal Smart Checkout.

paypal-smart-button-configuration

Step 6) To set up this feature you will now need to Log in to your PayPal Developer Account to locate your API details. You will need a PayPal Business Account.

Step 7) Click on the My Apps & Credentials menu within your PayPal Developer Account.

Step 8) Scroll down to the Rest API Apps section.

Step 9) Click the Create App button.

Step 10) Give your app a name that relates to it’s intended use.

Step 11) Click the Create App button.

Step 12) You will now see your Sandbox Client ID and your Sandbox Secret Key (once you click the ‘show’ button).

Step 13) Click the Live button in the left hand corner to show your Live API Keys.

configuring-paypal-smart-button-wordpress

Step 14) Copy and paste both your Live and Test Client ID’s and your Live and Test Secret Keys from your PayPal account into the settings menu of your WP PayPal Shopping Cart. Ensure you paste them in the correct fields.

Step 15) If you would only like to offer Smart PayPal Checkout, mark the checkbox next to Disable Standard PayPal Checkout. Alternatively, you can choose to offer both at once by leaving this box unmarked.

Step 15) Click the Update Options button. You have now completed the setting configuration for PayPal Smart Checkout.

Step 16) Your Simple PayPal Shopping Cart Products will now be able to be purchased through this PayPal checkout method.

Purchasing a Product via PayPal Smart Checkout

A customer can add an item to your Simple PayPal Shopping Cart. Once the item appears in the cart, the customer can go ahead and checkout using PayPal Smart Checkout. They can click the button that applies to them.

For example, in the following example, the customer clicks the PayPal button because they wish to pay directly from their PayPal account.

Once a customer clicks on one of the PayPal Smart Checkout buttons, a popup appears where they can complete the checkout process by entering in the appropriate details.

paypal-smart-checkout-product paypal-smart-checkout-popup

Customizing the Smart Checkout Buttons

Read our documentation on smart checkout buttons customization.

PayPal’s Pay In 4 (Buy Now Pay Later Option)

Read our PayPal’s buy now pay later documentation to learn more about it.

Filed Under: WordPress Shopping Cart Tagged With: e-commerce, Installation, Integration, paypal, paypal advanced, paypal api, Usage, WP Shopping Cart

WP eStore – How Does the Manual Checkout Option Work?

This documentation will address the usage and setup of the ‘Manual/Off-line Checkout Settings‘ feature of the WP eStore plugin.

What is the Manual Checkout Option?

The manual checkout option (when enabled) allows your customers to proceed to checkout with an item without needing to pay. This feature is useful if you have a business that has physical products where most of the transactions occur offline. Other business owners are able to use this feature to sell items to a non-for-profit organization where they give the items in return for a payment later on. The ‘Manual Checkout Option’ is also widely used for companies that wish to offer an in-store pickup and payment option.  This feature is fully customizable allowing you to:

  • Choose if the product database is updated automatically after a manual checkout
  • Add a shipping charge
  • Customize emails sent from the plugin to both the seller and the buyer
  • Direct your customers to a specific page after the checkout is complete
  • Decide on functions that relate to the WP Affiliate and eMember plugins

manual-checkout-option

How Do my Customer’s Checkout with the Manual Option?

1) Your customer goes to your store and checks out via the manual checkout option.

2) The customer gets an email that contains all the items he/she ordered.

3) The customer also gets some “instructions” in the email. You specify the instructions in the “Directions for the Customer” field under the manual checkout settings section. This instruction could read:
“Come to our store [address of your store] with the money to pickup your item.”

Example: Ability to Manually Checkout

manual-checkout-box

Example: Manual Checkout Form

form-for-manual-checkout-option

Locating the Manual Checkout Option

The manual checkout option is located in the ‘Settings’ menu of the WP eStore plugin.

  1. Click on the ‘Settings’ menu of the WP eStore plugin.
  2. Click on the ‘Payment Gateway Settings’ tab.
  3. You will now see a section titled ‘Manual/Off-line Checkout Settings’. This documentation will focus on this feature of the plugin.

Configuring the Manual Checkout Option

Configuring the manual checkout option is simple and easy.

Step 1) Under the ‘Payment Gateway Settings‘ tab, you will need to check the ‘Use Multiple Payment Gateways‘ box to be able to offer both a standard checkout (for example, PayPal) and a manual checkout to your customers.

Step 2) Use the above steps to locate the ‘Manual Checkout Options’ area. Check the box next to ‘Use Manual Payment Option‘ to enable this feature.

Step 3) Enter in the email address of the seller (merchant) and choose a subject for the emails that will be sent from the plugin.

Step 4) If you would like to add directions for your customers, you can type these in the ‘Directions for Customers‘ box. Email tags can be used in this field.

Step 5) Paste in a return URL where you would like to send your customers after they have enter in their details for manual checkout.

manual-checkout-options

Step 6) Tick the boxes for the following if they apply to your product: ‘Do Not Add Shipping Charge‘, ‘Automatically Update Customer & Product Database‘, ‘Create Membership Account‘, ‘Perform Autoresponder Signup‘, ‘Automatically Award Affiliate Commission‘ and ‘Send Product Download Links in the Email‘.

Step 7) You can edit the title of the ‘Manual Checkout Option’ viewed by your customers from the word ‘Manual’ to the wording of your choice in the ‘Manual Checkout Selector Label‘ field.

Step 8) Ensure you ‘Update‘ the changes you have made.

manual-checkout-full-options

Promoting Manual Checkout for the Products

To give your customers the option to use the ‘Manual Checkout Option’ you will need to use an ‘Add to Cart’ button. This can be a ‘fancy’ add to cart button or a simple add to cart button. Using a ‘Buy Now’ button will not offer your customers the choice of ‘Manual Checkout’. Your customer will see the option to checkout manually when they view the ‘Shopping Cart’. The ‘Manual’ option appears beneath their item total in a drop down menu. To complete a manual order, your customer will be required to fill in an order form.

When a customer checkouts using the ‘Manual’ option, their ‘Payment Status’ will appear as ‘Unpaid‘. This can be manually edited by admin once the customer pays cash in person or transfer money into the business account.

Filed Under: WordPress eStore Tagged With: e-commerce, eStore, Payment Gateways, WordPress eStore, WP eStore

Running Additional Tasks After a Sale via the Simple Cart Plugin

You can run some additional tasks after the simple cart plugin has processed a sale.

Note that this should only be tried by a developer as it involves custom PHP coding.

The plugin has an action hook that gets fired after the PayPal IPN (Instant Payment Notification) data is processed. You can use this hook to do additional custom tasks. Below is an example snippet of code that shows you how to use this action hook.

Add the following block of code to your functions.php file of the theme:

add_action('wpspc_paypal_ipn_processed', 'wspsc_my_custom_ipn_tasks');
function wspsc_my_custom_ipn_tasks($ipn_data)
{
    //You can write the $ipn_data array's content to a file to see
    //what paypal sends in the IPN
    $firstname = $ipn_data['first_name'];
    $lastname = $ipn_data['last_name'];
    $email = $ipn_data['payer_email']
    //Do something with the data

}

The IPN message consists of variables and is available as an array inside your function. You can access an element of the array by using the proper variable name. To see a list of all the available variables please check the PayPal IPN documentation page.

Filed Under: WordPress Shopping Cart Tagged With: code example, e-commerce, Tweaks, WP Shopping Cart

Product Display Template for Selling Videos

If you are selling videos from your WordPress site and you want to present the video product using a nice template then use this addon plugin.

You can configure a preview of the video that you are selling so your customers can preview it before purchasing the item.

Note: The video preview will need to be a YouTube video.

screenshot showing the video product template

Clicking on the “Play” button will preview the video in a lightbox window (see example below).

video-product-display-lightbox-preview

Installing the Video Product Template Addon

You can install this addon the same way you install any WordPress plugin:

  • Go to the “Add New” plugins screen in your WordPress admin area
  • Click the “upload” tab
  • Browse for the addon file (eStore-video-products.zip)
  • Click “Install Now” and then activate the plugin

Using this Addon

When this addon is active, You can easily enter some video specific information in the “Add/Edit Product” interface.

  • Video Preview URL: URL of the video that will be used as a preview on the front end (YouTube/Vimeo)
  • Video Duration: Duration of the video (It will also be displayed on the front end)

screenshot showing how to configure information for video product template

Since the video template requires a thumbnail for the video you will need to specify one in the Thumbnail Image URL field.

screenshot showing the thumbnail image url field of video product

Click the “Save” button to update the product.

Video Product Template Display

Create a new post/page and specify the following shortcode to show your video template:

[wp_eStore_video_product_template id=”2″]

Here, The value of id is the unique product ID for your eStore video product.

screenshot showing the video product template

Get the Video Product Display Template Addon

The price of this addon is $39.95

Please contact us to purchase this addon.

Filed Under: eStore AddOn Tagged With: e-commerce, product box, products, sell audio, sell media, video, video on demand, WP Shopping Cart

Copy Customer Details to Create a New Customer Record

If you needed to create multiple customer record entries with a slight variation then use the “copy customer record” feature of the eStore plugin.

Go to the “Add/Edit Customers” interface and look at the “Copy Customer Details from an Existing Customer” section. See screenshot below:

copy-customer-details-interface

You can copy the existing customer record then change the value of some fields (for example: the products they purchased) then save it as a new record.


Filed Under: Additional Resources Tagged With: customers, e-commerce

Google Analytics E-Commerce Tracking Addon for eStore Plugin

google-analytics-ecommerce-tracking-addon-thumbnail

The Google Analytics E-Commerce Tracking addon allows you to do ecommerce tracking without needing any another analytics plugin.

You just have to activate this addon and configure some Google Analytics API details and you are all set.

This addon uses universal tracking so the user doesn’t even have to come back to the thank you page for it to work.

google-analytics-ecommerce-tracking

E-Commerce Tracking Usage Instructions

1) Once you have installed the addon Go to WP eStore->eCommerce Tracking.

screenshot showing the eStore google analytics tracking addon menu

2) Enter your Google Analytics Tracking ID.

screenshot showing the eStore google analytics tracking addon settings

3) Save the settings.

Download E-Commerce Tracking Addon

You can download this addon by clicking here.

Filed Under: eStore AddOn Tagged With: Analytics, e-commerce

Automatically Return Customers from PayPal to Your Thank You Page

In this tutorial, I will explain how you can setup your PayPal account to automatically return(redirect) your customers  from PayPal to your site’s Thank You page after a payment.

Note: You need to have a PayPal business or premier account to be able to do this. Upgrading from a personal PayPal account to one of these accounts is free.

Steps for Setting up Auto Return:

Step 1: Log into your PayPal account.

Step 2: Go to My Account -> Profile

Step 3: Click on the selling tools link.

Step 4: Check the selling online section

Step 5: Look for “Website Preferences” and click the “Update” link on the far right hand corner of this row. See the following screenshot for reference

getting-paypal-pdt-token-id

Step 6: You should now be on the “Website Preferences” menu.

a) Turn on the “Auto Return” for Website Payments
b) Enter a URL in the Return URL field (your thank you page URL)
c) Scroll down to Payment Data Transfer and enable it.
d) Scroll to the bottom of the page and click the Save button
e) PayPal will give a success message and show you your PDT ID Token
f) Copy the PayPal PDT ID token and use it where you need to specify it.

Note that PayPal does not do auto return if the customer doesn’t pay using their PayPal account.

Expected Behavior After You Enable Auto Return

Scenario 1) Customer pays via paypal account -> Gets automatically redirected to your thank you page.

Scenario 2) Customer pay via a credit card -> Gets shown a receipt page on Paypal -> The customer clicks a link on this page and gets sent to your thank you page.

Filed Under: Tutorials Tagged With: e-commerce, paypal, paypal api

Adding a Shopping Cart to The Sidebar of Your WordPress site

Use the following steps to add a shopping cart to the sidebar of your WordPress site. This will allow your customers to see what items they have in their cart when browsing and adding items to the cart.

Steps to Add a Sidebar Shopping Cart

Step 1) Go to the widgets menu of your WordPress admin dashboard area.

Step 2) Add a standard text widget to the sidebar of your site. Your theme need to support sidebars.

adding-a-sidebar-cart-widget

Step 3) Use one of the following shortcodes to add the cart in this sidebar widget:

[show_wp_shopping_cart]

or

[always_show_wp_shopping_cart]

The first shortcode will only show the cart if there are any items in the cart. The 2nd one will always show the cart (even if the cart is empty).

Try them both and use the one that you like.

Below is an exmaple of how the cart should look on the sidebar:

how-the-cart-looks-on-the-sidebar

Adding the Cart to the Sidebar via a Template File

If you are a developer and you are trying to add the cart to the sidebar from your theme’s template file then use the following PHP function:

<?php echo print_wp_shopping_cart(); ?>

Filed Under: Additional Guidance Tagged With: cart shortcode, e-commerce, WP Shopping Cart

WP Shopping Cart – Stacking Multiple Product Boxes Side by Side

I received the following question today from one user:

I love the display box feature, yet I cannot get them to align horizontally on the page. How can I get more that one item per line?

In this tutorial I will explain how you can stack the product boxes side by side to display multiple products in one line.

Preparation

If you don’t know how to create a product box using the WP Shopping Cart plugin then read this page first.

CSS Tweaks

I am going to apply a few custom CSS tweaks to stack the product boxes horizontally.

Step 1) Grab this custom css plugin (it allows you to add your custom CSS code without modifying the main plugin).

Step 2) Lets make the product boxes narrower so there is more room to have multiple boxes side by side.

Add the following block of CSS code in the custom CSS plugin’s interface to define a maximum width of 250px for the boxes.

.wp_cart_product_display_box{
max-width: 250px;
}

You can use a different value if you want to make it narrower.

Step 3) Lets float the product boxes so they stack. Add the following CSS code just below the max-width that you defined in step 2:

float: left;

You should have the following combined CSS code and the boxes should be stacked side by side now:

.wp_cart_product_display_box{
max-width: 250px;
float: left;
}

Step 4) Finally, lets give it some margin to add some space between the boxes.

Add the following CSS code just below what you defined in step 3:

margin-right: 10px;

You should have the following combined CSS which is the final code

.wp_cart_product_display_box{
max-width: 250px;
float: left;
margin-right: 10px;
}

The Final Output

The final output should look like the following example (your product boxes will be aligned horizontally):

shopping-cart-grid-product-boxes-example

Our WP eStore plugin has more product display templates and better grid layout options. You can check the styles offered in WP eStore by visiting this page.

Filed Under: WordPress Shopping Cart Tagged With: e-commerce, grid layout, product box, Product Display, WP Shopping Cart

  • 1
  • 2
  • Next Page »

Your Shopping Cart

Shopping Cart Empty
Shopping Cart is Empty
Visit The Shop

Search

Featured Documents

Stylish Product Display Options for WP eStore WP eStore Quick Setup and Usage Video Tutorial WP eStore Shortcodes and Functions Reference WordPress eStore Plugin Features WordPress eStore Plugin Demo What Our Customers Have to Say About Our Products WordPress eStore WishList (Feature Suggestions) WordPress eStore Frequently Asked Questions (FAQ) How to Show Add to Cart buttons

Featured Plugins

wordpress_estore_icon
wordpress membership plugin icon
WP Express Checkout Plugin
Lightbox Ultimate Plugin
wordpress_affiliate_plugin_icon

Copyright © 2023 | eCommerce Plugins