WordPress Membership

Easy to use WordPress Membership plugin

  • Documentation
  • WP eMember Plugin
  • Projects
  • Home

Free Members Must Confirm Their Email Address

Usually you just send the visitors who are after a free membership to the “Registration” page and they can signup for a free membership (signing up for a free membership has no restriction). If you want to make it so they need to confirm their email address before they can create a free account (similar to what happens for the paid membership) then you can achieve that using one of the following two methods (use the one that suits your setup).

How the Registration Process Works with This Feature

When the Free Members Must Confirm Email feature is enabled, the registration process follows these steps:

  1. Member Fills Out the Pre-Registration Form
    The user fills out the pre-registration form on your site to initiate the registration process.
  2. Prompt to Complete Registration Email Sent
    After submission, the system sends an email to the provided address containing a unique link for completing the registration.
  3. Member Completes the Registration
    The user must click the unique link in their email to complete the registration and verify their email address.

How to Enable This Feature

Note: you only need to use one of the following two methods (there is no need to follow both of them).

Method 1

Go to the settings menu of the WP eMember plugin and check the “Free Members Must Confirm Email Address” field. When this option is checked, the standard registration form gets replaced with with a small registration initiation form for email verification (the user will see the full registration form after the verification). When a user fills in this email verification form (name and email address) a unique registration link is sent to the specified email address. Users will only be able to register for a free member account after they click on the unique registration link sent to their email address.

Method 2

In this method you simply need to add in one extra step before the registration.

Create a NEW WordPress page with the desired name (example: Free Membership) then place the following shortcode on that page:

[free_rego_with_email_confirmation]

Now, you can place a link on your “Join Us” page to this newly created page to start sending potential visitors. When they fill in the form created by the above shortcode they will receive an email which will let them complete the free membership registration after they click on the link sent to them via email.

Using with a Particular Membership Level

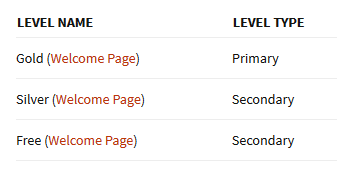
You can also use this shortcode with a particular membership level. This is useful if you want to offer multiple free membership levels.

So for example, if you wanted to use it for membership level ID 2 then you could use the following shortcode:

[free_rego_with_email_confirmation level=2]

Redirecting to a Page

You can also setup a redirection with this shortcode so that the users get redirected to a page after they submit the form. Use the “redirect_to” parameter in the shortcode to specify a page URL where you want to redirect the users after they submit the free registration confirmation form.

Example shortcode usage below:

[free_rego_with_email_confirmation redirect_to="http://example.com/page-after-submitting-form"]

Note/F.A.Q

We get asked the following question a lot on this “Free member must confirm email” topic:

Q. Can we still use the full registration form for free membership or why can’t I see the full registration form?

A. It’s important to note that this process does not replace the full registration form. The member will still need to complete the full form, including selecting a username and password. This feature simply adds a verification step beforehand to ensure the email address is confirmed.

In summary, when a visitor fills out the pre-registration form and clicks the confirmation link sent via email, they will then be able to complete the full registration form and become a free member.

Filed Under: Design & Usage Tagged With: confirm email address, WP eMember

How to Use Google First Click Free Feature with Your Membership Site

Implementing Google’s First Click Free (FCF) for your content allows you to include your restricted content in Google’s main search index. WP eMember has an option that allows you to enable the Google first click free feature on your membership site.

What is Google First Click Free Feature?

  • Read the details of First Click Free feature from Google’s site
  • More details from the Google Webmaster Central Blog

What You Need to be Aware of?

  • When you use this feature a visitor (non-member) can see your protected content if they follow a link from Google’s Search result. So yes, you are somewhat compromising the security of your protected content.
  • All users who click a Google search result to arrive at your site should be allowed to see the full text of the content they’re trying to access.
  • The page displayed to all users who visit from Google must be identical to the content that is shown to Googlebot.
  • We implemented this feature following exactly what Google recommended and we intend to keep it this way (it is good idea to follow Google’s policies if you don’t want to get your site banned).
If you are uncomfortable with any of the above then DO NOT use this feature.

How Do You Enable it in eMember?

  1. Go to the settings menu of eMember and check the “Enable Google First Click Free Feature” field to enable this feature.
  2. Wait for Google to index your protected content.
Now, when a user follows a Google search result and lands on your protected article, WP eMember will display the full content of the protected article to this user. If the user clicks on any other link on your site then the normal protection rules are applied as usual.

Filed Under: Design & Usage Tagged With: Google First Click Free, WordPress membership, WP eMember

How to create a Video Membership Site with Complete Protection to Your Videos

With General Protection feature of WP eMember you can easily secure your videos from anonymous visitors. Here is how you do it:

  1. Create a post/page in WordPress.
  2. Embed the video on the post/page that you want to offer to the members of a particular membership level. (If you don’t know how to configure the basic membership settings using WP eMember please watch the video tutorial here).
  1. Go to WP eMember->Membership Level->Manage Content Protection section under WP Dashboard. In this section you can set which pages/posts you don’t want the anonymous visitors to see. In this case you can set protection to the post/page you just created and grant access to this post/page for a certain membership level (Detailed explanation can be found here).
  1. Now whenever any member from that particular membership level (the one you granted access to) logs in, the member will be able to view the content of the page (in this case: the video you embedded on that page). Any other anonymous visitors will be asked to log in when they stumble upon that post/page.

This will be good enough for most users but if you want to add another layer of protection for your super secret videos then continue reading.

Ultimate Video Lockdown

The key is to use Amazon S3’s private/protected file option.

To add complete protection to your videos we recommend you use the following two service/product with eMember:

  • Amazon S3 Account
  • WP Lightbox Ultimate Plugin

Amazon S3 has an option where you can make a video file private (If you are selling video content on your site then you should be using Amazon S3). Amazon S3’s private/protected video can only be retrieved by an application using a secure API so there is no way for anyone to go directly to the URL of the file and download it.

The WP Lightbox Ultimate plugin has an option that can use the secure amazon s3 API and allows you to embed private/protected Amazon S3 videos on a WordPress post or page.

The following steps will ensure the complete protection of your videos:

Step 1: Upload your videos to Amazon S3 and make the files private/protected so no one can retrieve the file without the secure API (only you know the API access keys).

Step 2: Embed the private video on your WordPress post or page using the WP Lightbox Ultimate Plugin. You can directly embed the private/protected video on the page (no lightbox) or embed it using the lightbox option (the video will play in a lightbox).

Step 3: Protect the WordPress post or Page using eMember so only members with the correct permission can see the content of the page.

The following video explains how this protected/private Amazon S3 video works with the Lightbox Ultimate plugin:

WP eMember

Another Method of Creating a Video Membership Site

Check the limiting access to video content tutorial to learn another method of offering videos to your members.

Filed Under: Design & Usage Tagged With: online course, video membership site, video protection, WordPress membership

WP eMember Protection – How to Enable Site Wide Protection

WP eMember has a site wide page protection feature. Depending on your site’s content you may want to use the site wide content protection feature so only logged in members can see any part of your WordPress site.

Video Tutorial

Enabling Site-wide Protection

Simply go to the WP eMember settings and look  for the section titled “Site Wide/Domain Level Page Protection Settings” to enable this feature.

Site Wide/Domain Level Page Protection Settings

When the “Enable Site Wide/Domain Level Lockdown” option is checked, it will restrict anonymous visitor access to your WordPress site (the site won’t even load unless the visitor logs in as a member). The only page the visitor will be able to access on the site when not logged in is the “Join Us” page.

When you use this option anyone trying to access your WordPress site will be greeted with the following screen:

Prompt to anonymous visitors when they try to access locked down page

The only action available to the visitor is either to log in as a member or signup for a membership.

Lockdown Specific Pages

There is also an option to lockdown some pages selectively by using the “Enable Specific Page Lockdown” option. You can also specify a URL pattern to lock every page that matches that pattern. For example if you specify /some-category/ then all the following pages will be locked down:

www.example.com/some-category/an-example-permalink
www.example.com/some-category/sub-category/another-example-permalink
www.example.com/test1/test2/some-category/another-example-permalink

This technique is very useful when you want to lockdown a group of pages on your WordPress site.

Filed Under: Design & Usage

How to Use Multiple Membership Levels Per User

The default settings in WP eMember is to use one membership level per user at any given time. So every member of your site is assigned to one of the membership levels that you have created and the members can access content based on their membership level.

When members make a payment for a different membership level, their current level is upgraded to the one they just paid for (Example: upgrade from “Silver Level” to “Gold Level”). This is the setup that is used on most membership sites.

Table of Contents

  • Multiple Membership Levels Per User Feature
  • Showing a List of User’s Membership Levels
  • Customizing the Text/Labels
  • Multiple Membership Levels Feature Video Tutorial

Multiple Membership Levels Per User Feature

Depending on your situation, you may need to assign multiple membership levels to one user. So a member can have one or multiple membership levels in his profile. In this setup, the membership levels will stack. So for example, if someone belongs to “Membership Level A” and then he makes a payment for “Membership Level B” then he will end up with two membership levels in his profile (Level A and Level B). The member will be able to access content from both level A and B.

Do the following to use the multiple membership levels per user feature:

Step 1) Go to the general settings menu of eMember plugin.

Step 2) Check the “Enable Secondary Membership” field and save the settings.

Step 3) You can can assign additional membership levels to each of your members when you edit their profile:

If you have integrated the payment buttons with WP eMember already then when a logged-in member makes a purchase using that button, the membership level will be automatically added to their profile. The newly paid membership level will be set as the new main membership and the old one will be moved to the additional levels field.

Note: Even though a member can have multiple membership levels assigned to his profile, there will still need to be a primary membership level for the member. When you use auto upgrade it will work based on the primary membership level of the member.

Showing a List of User’s Membership Levels

If you enable the multiple membership level per user feature then you may want to show the users all the membership levels they have in their profile.

Create a new page and enter the following shortcode on this newly created page:

[wp_eMember_my_membership_levels]

You can also show the welcome page of each of the levels in the list by using the “show_welcome_page” parameter in the shortcode:

[wp_eMember_my_membership_levels show_welcome_page=1]

It will show all the membership levels of the logged-in user. Each level will also have a link to the “Welcome Page” of that membership level.

show-a-list-of-user-membership-levels-screenshot

This will allow your members to easily go to the welcome page of all the membership levels they purchased.

Customizing the Text/Labels

You can use the following parameters in the “show membership levels” shortcode to customize the text labels:

level_name_label='Level Name'
level_type_label='Level Type'
primary_label='Primary'
secondary_label='Secondary'
welcome_page_anchor='Welcome Page'

Below is an example showing you how it is used:

[wp_eMember_my_membership_levels level_name_label='Membership' level_type_label='Membership Type']

Multiple Membership Levels Feature Video Tutorial

Filed Under: Design & Usage

How to Use Public Profile Listing (Member Directory Listing)

If you want to list all your members in a public directory style on a webpage so others can browse the list then use the “Public Profile Listing” feature.

New Way of Displaying Member Listing

We have created a free addon that can display a public profile listing of your members. This new extension is the preferred method of showing a user list on your site. Use this profile display extended addon to show your member list.

Old Way of Displaying Member/User Listing

The following documentation exists for backwards compatibility. It should not be used anymore to setup profile listing.

Step1: Enable this feature by checking the “Enable Public profile Listing” field in the settings menu of WP eMember.

Step2: Create a WordPress page and use the following shortcode to display the member list:

[wp_eMember_user_list]

This will show the member directory like the following:

wp-emember-public-profile-listing-sample

Public Profile Listing Sample

Clicking on an username will bring up the details of that user:

wp-emember-public-profile-listing-member-details-sample

Public Profile Details Sample

If you do not want to display the “Email Address” field then you can use the following shortcode to display the public profile listing which will keep the email address of the users hidden:

[wp_eMember_user_list no_email=1]

More Customization Option of Displaying Member Profile

If you need more customization options as to which fields gets shown then checkout the eMember profile extended addon.

Filed Under: Design & Usage Tagged With: Profile Listing, WP eMember

WP eMember and MailChimp Integration

The WP eMember (membership plugin) can be easily integrated with MailChimp (Email marketing and Email list manager). This allows you to add members to your MailChimp list as they join your membership site.

To integrate MailChimp with eMember simply go to the “Autoresponder Settings” tab from the Settings menu of eMember and set it up.

  1. Check the “Use MailChimp AutoResponder” field
  2. Specify your list name in the “MailChimp List Name” field
  3. Specify your MailChimp API Key that you can get from your MailChimp account
  4. Save the settings by hitting the “Update Options” button at the bottom of the page.

emember-mailchimp-autoresponder-integration-settings

You can also signup members of different membership levels to different MailChimp lists. You can do this by editing a membership level then specifying the list name for that level.

Using MailChimp Interest Groups

You can add interest groups when a member is added to your MailChimp list too.

Add the interest group data in the “Autoresponder List/Campaign Name” field of a membership level like the following:

List Name | groupname1, groupname2

Lets say you have the following scenario:

List Name: my-list-1
Interest Group Names: groupname1, groupname2

Then you would enter the following in the list name field of the eMember plugin:

my-list-1 | groupname1, groupname2

Filed Under: Design & Usage Tagged With: Autoresponder, WP eMember

How to Protect a Post or Page From the Editor

WP eMember allows you to protect a post or page while you are editing it. When you are editing or writing a new post simply scroll down to the “eMember Protection Options” section shown in the following screenshot and apply the protection you want (it will display all the membership levels you have configured on your site so you can easily pick which levels you want to give access to):

Protect Post or Page from the editor

Video Tutorial

Filed Under: Content Protection, Design & Usage Tagged With: membership protection, video protection, WP eMember

How to Customize Which Fields Appear on the Registration and Edit Profile Page

WP eMember plugin allows you to customize the fields that appear on the registration and edit profile page. You can choose to not display some of the fields depending on your site’s need.

In order to customize which fields appear on the form, go to the following settings/configuration area:

WP eMember Settings -> Pages/Forms Settings

The “Registration Form Fields” section in this menu page (see screenshot below) allows you to turn on/off certain fields from the registration page. You can also make certain fields required.

emember-registration-form-field-configuration

The “Edit Profile Form Fields” settings section allows you to configure fields that you want to show in the edit profile page.

Adding Custom Fields

If the default fields offered in eMember is not enough then you can add custom fields to the registration and edit profile form to collect extra data required for your business.

Go to the “Custom Field Settings” tab (from eMember settings menu) and configure the extra fields that you want to add. After you hit the “update options” button the extra fields will show up in the “Registration” and “Edit Profile” form on your site.

Note: the custom fields you add will show up on your registration and edit profile page directly… you don’t need to configure these fields from the “Pages/Forms Settings” section.

membership-custom-field-configuration-steps

Need More Custom Field Control?

We have an advanced eMember addon that has more custom fields controlling options.

Filed Under: Design & Usage Tagged With: customize registration fields, Usage Guide, WP eMember

Using a Compact Login and Join Us Message

You can use a compact login form if you want to display an “one line login and join us” message anywhere on your membership site. When a member logs in, it will display the name of the logged-in member and an option to logout.

For example, I have placed this compact login form on the header of my theme and it looks like the following to an anonymous visitor:

Compact Login Form Display (when not logged-in)

When a member logs into the site, it looks like the following to that user:

Compact Login Form Display (when logged-in)

How to Use the Compact Login Form?

You can use the following shortcode if you are placing it on a post or page:

[wp_eMember_compact_login]

If you are placing this on your theme’s template file then use the following PHP fuction where you want it to appear (example: header.php, footer.php etc):

<?php echo eMember_compact_login_widget(); ?>

Adding the Compact Login Form to the Sidebar

Here is how you can add the compact login form to your site’s sidebar widget:

#1) Add a standard text widget to your sidebar (where you want to show the compact login form).
#2) Use the following shortcode in the text widget:

[wp_eMember_compact_login]

#3) Save the widget.

Filed Under: Design & Usage Tagged With: Compact Login, WP eMember

  • « Previous Page
  • 1
  • 2
  • 3
  • 4
  • Next Page »

Get the WP eMember Plugin

Get WP eMember

Categories

  • Additional Resources
  • Content Protection
  • Design & Usage
  • eMember Addon
  • Installation
  • Integration
  • License
  • Testing
  • Uncategorized
  • Video Tutorial

Recent Comments

  • Chris Brown on API – Querying A Member Profile Using HTTP GET or POST
  • admin on API – Updating A Member Account Using HTTP GET or POST
  • Chris Brown on API – Updating A Member Account Using HTTP GET or POST
  • admin on API – Updating A Member Account Using HTTP GET or POST
  • Andrea on API – Updating A Member Account Using HTTP GET or POST

Featured WordPress Plugins

WP Express Checkout Plugin
wordpress_estore_icon
wordpress membership plugin icon
wordpress_affiliate_plugin_icon

Copyright © 2025 | WP Membership Plugin