WordPress Membership

Easy to use WordPress Membership plugin

  • Documentation
  • WP eMember Plugin
  • Projects
  • Home

How to Use the Auto Upgrade Feature to Drip Content

What auto upgrade does is that it upgrades the member of any membership level to another membership level automatically in the background based on what you have scheduled (you as the admin can schedule and setup these upgrade paths).

How Auto Upgrade Works

Auto upgrade works based on the time duration that you set in the configuration. This time duration is specified by the admin in the “Auto Upgrade” tab under the “Members” menu.

Auto Upgrade Starts Date

The auto upgrade date is calculated from a date value called the “Auto Upgrade Starts” date.

By default, the auto upgrade starts date value is set to the date the member registers on your site.

You can edit a member’s record from the admin side and view the value of this field (you can edit this value also if needed).

membership-auto-upgrade-starts-date-value

When you see a reference like “auto upgrade level after 7 days”, it means the level will be upgraded 7 days from the date you see in the “auto upgrade starts” date field.

Auto Upgrade Configuration

So for example, let’s say you have three membership levels:

  • Basic Membership
  • Premium Membership
  • Ultimate Membership

Now let’s say you have set the auto upgrade so that a member will get automatically upgraded to premium membership (from basic member ) after 7 days. This same member will get upgraded to the ultimate membership after 14 days.

Basic Membership -> Premium Membership = after 7 days
Premium Membership -> Ultimate Membership = after 14 days

If Joe signs up to the “Basic membership” on 1st January 2016, then he will get upgraded to the premium level on the 8th and then he will get upgraded to the ultimate level on the 15th.

If someone joins the “Premium Membership” on 10th January 2016, then he will get upgraded to the ultimate level on the 24th.

Once a member gets upgraded to the next level he/she gets access to the new content based on this new membership level. This is why this feature is very handy when you are developing a membership site that will be used to deliver an online course and you want to drip the course content over a period of time.

So using the above example model, if you want a member to be upgraded to “Premium Membership” after a week and then to “Ultimate Membership” after another week, the corresponding “number of days” value for the auto upgrade settings will be 7 and 14.

Important Note

It is important to keep in mind that the “number of days” value that you use when configuring auto upgrade settings is an absolute value from the “Auto Upgrade Starts” date. This value is not based on when a member’s account got upgraded to the next level.

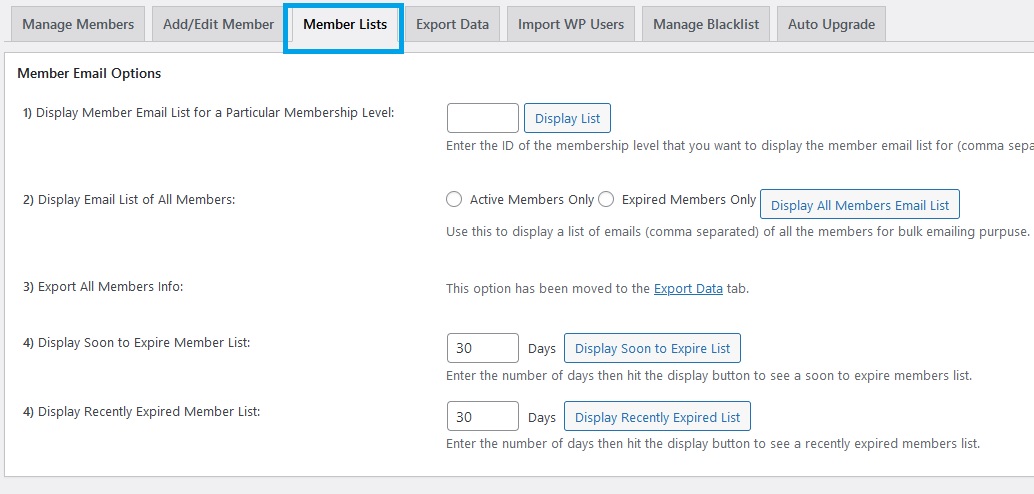
Where is the Auto Upgrade Configuration Menu?

You can find the auto upgrade menu at the following location:

WP eMember -> Members -> Auto Upgrade

Auto Upgrade Configuration Video Tutorial

Filed Under: Design & Usage Tagged With: Auto Upgrade, Drip Content, WP eMember

How to Create Payment Buttons for Membership Upgrade or Renewal

If you have a membership site with multiple premium memberships then you probably want to offer your members an option to upgrade their account. Upgrading an account is very easy.

Creating Upgrade/Renewal Payment Buttons

1) Option A – PayPal Button for Membership Renewal/Upgrade

Step #1) Create a payment button the same way you created it for your membership joining page.

Step #2) Enter the URL of this newly created upgrade/renewal page in the “Membership renewal Page” settings field of the plugin and save the settings.

When a member wishes to upgrade his/her account, all this member has to do is click on the payment button and make the payment. After the payment, the plugin will use the payment email address to identify the correct member account and upgrade or renew the account automatically.

2) Option B – Using an eStore Button for Membership Renewal/Upgrade

Step #1) Create an eStore payment button the same way you created it for your membership joining page.

Step #2) Enter the URL of this newly created upgrade/renewal page in the “Membership renewal Page” settings field of the plugin and save the settings.

When a member wishes to upgrade his/her account, all this member has to do is click on this button and make the payment. After the payment, the plugin will use the payment email address to identify the correct member account and upgrade or renew the account automatically.

WP eStore’s payment buttons are a little more advanced than a standard PayPal button in the sense that it can carry more data. So when using an eStore button it is also possible to upgrade the member account that is logged into the site at the time of making the payment (In this case it doesn’t matter which email address the payment is coming from).

When logged-in members make a payment, the plugin will apply the payment to their exiting account profile.

What if the Member Account is Expired?

What about the members whose account is expired? They can’t log into the site anymore. We have thought about that too. Simply go to the eMember settings menu and check the “Allow Expired Account login” field from the “Account upgrade and renewal settings” section.

Don’t worry, just because they can log into the system doesn’t mean they can view the restricted content. Expired member accounts will not be able to view any protected content. They will see a message that tells them to renew the membership. You are allowing them to log into the system so the plugin can recognize their account profile.

The following screenshot shows where you can configure the renewal page within the plugin’s settings.

Adding More Flavor to Your Upgrade/Renewal Buttons

If you want to add a little bit of flavor to your membership upgrade path then create special payment buttons that are just like the payment button for the normal premium membership but with a discounted price. Then place it on a page that only premium members have access to. You can create a special page with all these discounted prices.

Now, your members can make payment using these buttons to upgrade their accounts at a discounted price. Since this page (that contains the buttons) can only be viewed by a premium member, an anonymous visitor won’t be able to signup at this special discounted price.

Filed Under: Design & Usage Tagged With: Account Upgrade, WP eMember

How to Display a Member’s Purchase History

You can create a WordPress page and use the following shortcode on it. This shortcode will display all the membership levels (both primary any secondary levels) that a member has in his/her profile.

[wp_eMember_my_membership_levels]

Here is an example of what it will show:

You can also show the welcome page of each membership level using this shortcode (if you have one for your membership levels). Use the following shortcode to list the membership levels a user purchased with a link to the respecting welcome page of that level:

[wp_eMember_my_membership_levels show_welcome_page="1"]

The above shortcode will produce an output like the following example:

show-members-purchased-levels-with-welcom-page

Using a Purchase History for WP eStore Products

When a member makes a purchase through eStore while logged in, it will be recorded. The member can then view his/her purchase history.

You can use the following shortcode on a post or page to display a member’s purchase history:

[wp_eStore_members_purchase_history]

It will display the purchase history of the member who is logged in and viewing that post or page. Please note that the purchase history only works for purchases done via the eStore plugin so you will need to have both eMember and eStore installed on your server (the above shortocode is actually an eStore shortcode).

The purchase history looks similar to the following screenshot:

members-purchase-history-sc

Screenshot of a Member’s Purchase History

So, ideally you will create a page called “Purchase History” and place the above shortcode on the page then protect the page from the “General Protection”. Now, give the other membership levels access to this page which will allow the logged in members to view their purchase history.

Display Member’s Purchase History With an Option to Download

You can use the following shortcode on a post or page to display a member’s purchase history with an option to download the purchased files

[wp_eStore_members_purchase_history_with_download]

This will let your members see their purchase history and download any item they previously purchased.

Filed Under: Design & Usage Tagged With: Purchase History, WP eMember

How to Use a Simple PayPal Payment Button to Accept Membership Payment

A lot of people use the WP eStore plugin to create payment buttons for membership as it has a range of benefits but you can use a PayPal payment button (“Buy Now” or “Subscribe”) that you create in your PayPal account to accept payment for your premium members too.

Buy Now Type Button or Subscription Type Button?

  • Difference between “Buy Now” and “Subscription” type buttons for membership payment

Video Tutorial Showing PayPal Button Integration

Setup Preparation

To create a membership payment button using PayPal, you will need two pieces of information:

  • The URL of the IPN handling script
  • The ID of the membership level that you are creating this payment button for

The above two pieces of information will go in the “advanced variables” field of your PayPal button. WP eMember has a settings menu that will allow you to generate the advanced variables code easily so you can copy and paste it into your PayPal button.

Step 1) Go to the following area of your WP Admin dashboard:

eMember Settings -> Gateway Settings -> Direct PayPal Integration settings

Step 2) You can find the ID of a membership level (example: 4) in the “Membership Level” menu of the WP eMember plugin.

Enter the Membership level ID in the appropriate box then hit the “Generate Code” button to generate the advanced variables code that you need to use in your PayPal button.

The advanced variables code it generates for your site should look something like the following (you will need to copy this code so you can use it in your PayPal button):

notify_url=http://www.your-domain.com/?emember_paypal_ipn=1
custom=subsc_ref=4

Specifying the “Advanced Variables” Code in the PayPal button

When you create your button on PayPal from the “Merchant Services” menu, you will be able to specify some advanced variables in “Step 3”.

Specify advanced variables

Specify advanced variables

  • Check the add advanced variables checkbox
  • Copy and Paste the text from the notepad saved earlier into the textarea.

Now, you can copy the button code that PayPal gives you and paste it in your “Membership Payment” page. When someone makes a payment using this button it will automatically create a membership for the membership level that is specified in the button.

Your PayPal Profile Settings

Make sure that the Instant Payment Notification (IPN) is enabled in your PayPal profile (this is enabled by default). You can enable it by going to the profile menu in your PayPal account.

If the IPN is disabled in your PayPal Profile then PayPal won’t send any payment notification to eMember after payment. This will cause the registration process to not work as usual and your users who pay you won’t get any email form eMember.

Creating a Thank You Page

You should create a generic thank you page for your membership site. Use this page as your return page in the PayPal button (so the user goes to this page after the payment).

Explain what the user can expect next in this “Thank You” page. Instruct your users to check their email and click on the link to complete the paid membership registration.

The following is an example of the type of message you should put on your thank you page:

You will receive an email shortly which will contain the details of this transaction.

You will also receive an email containing a special link. Click on that link in the email to complete your paid membership registration.

Advanced Integration with a PayPal Button (An Alternative Integration Option)

This section is only for users who are looking for an advanced integration option.

If you want to create a PayPal button that both your new users or existing members can use to pay or renew membership then use the following option. This is also useful when you want your existing members to be able pay using a different PayPal account or email address. It can also track the affiliate commission if you are using our affiliate platform plugin.

Step 1) Edit your PayPal button and remove any value from your PayPal button’s advanced variables section. If you are creating a new PayPal button then you can skip this step.

Step 2) Edit the WordPress page where you will add the PayPal button code for membership payment.

Step 3) Add the following shortcode inside your PayPal button’s HTML code.

[wp_eMember_paypal_fields level_id="2"]

In this example, 2 is the membership level ID for this button so you will need to change it for your site.

Your final PayPal button code on the page should look something like the following example:

paypal-button-integration-advanced-example

It works just like a normal membership payment button for new users. However, when your logged-in members use this PayPal button to Pay, it will upgrade their existing membership profile to the newly paid level or renew the existing level. It will also work with affiliate tracking (if you are using our affiliate tracking plugin).

Video Tutorial (Using a PayPal Buy Now Button)

Video Tutorial (Using a PayPal Subscription Button)

Note: Once the button code is generated in your PayPal account, make sure that it is not “protected” (Click the Remove code protection option if it is encrypted). You also need to make sure that the website tab is selected (not Email) so PayPal shows you the full button code.

Filed Under: Design & Usage Tagged With: membership payment, paypal, plain paypal button

WP eMember Shortcodes and Functions Reference

This PDF file that you can download from this page has a list of all the available Shortcodes and PHP functions that you can use to display the login form, registration form etc.

Download the WP eMember shortcodes list file

Filed Under: Design & Usage Tagged With: email tags, function reference, shortcodes

How to Use the Bookmarking Feature in WP eMember

The WP eMember plugin has a bookmarking feature that you can optionally enable from the settings menu of this plugin. When this feature is enabled your members will be able to bookmark their favorite articles on your site for easy access later.

When enabled members will see the following icon at the top right hand corner of every post and page which can be used to bookmark that article:

add-bookmark-icon

When they click on it the article will be bookmarked and icon will change to the following:

article-bookmarked

Members who are not logged in won’t be able to bookmark and they will see the following icon:

not-logged-in

A member will be able to access all his/her bookmarks from a page where you add the following shortcode (Create a WordPress page and place the following shortcode in it):

[wp_eMember_user_bookmarks]

Once you add the above shortcode on a page it will list all the bookmarks of the member who is viewing that page:

members-bookmarks

Manage Bookmarks Screenshot

Members can easily access any articles that they bookmarked previously from this page. They can also remove bookmarks from this page.

You can see how this feature works on the eMember demo site.

Filed Under: Design & Usage Tagged With: Bookmarking Feature, member bookmarks, WP eMember

How to Protect a Section of a Post or Page (Partial Protection)

If you want to protect a section or sections of a post or page then simply wrap the section with the “emember_protected” shortcode.

The following screenshot shows an example of how a partially protected page may look like. You can protect multiple sections of the post/page using multiple blocks of section protection shortcodes.

section-partial-content-protection-example

Section Protection Video Tutorial

Take a look at the following shortcode examples. It will show you how you can use the partial protection feature:

Note: When you copy and paste the shortcode, make sure to paste it in the “Text” mode of the page editor to prevent any HTML code from getting copied.

Simple Section Protection Example

[emember_protected]

Whatever content goes here is only visible to logged-in members who have access to this post or page.

[/emember_protected]

Section Protection for Specific Membership Level Example

[emember_protected for="2-3-4"]

Whatever content goes here is only visible to members who belong to the specific membership level specified above.

[/emember_protected]

Where 2,3,4 are the membership level IDs that you want to allow access to this section of content.

Section Protection for a Specific Member

[emember_protected member_id="1"]

Whatever content goes here is only visible to the member whose Member ID is 1.

[/emember_protected]

Section Protection for Anyone Who is Logged In

If you want to just protect a section of a post or page for logged in member (you don’t care if the member’s status is expired or not) then use the following shortcode:

[emember_protected scope="verified_users_only"]

Whatever content goes here is only visible to anyone who is logged-into the eMember system as a user (doesn't matter if his account is expired or not).

[/emember_protected]

Section Protection for Anyone Who is NOT Logged In

If you want to just protect a section of a post or page for non-logged in member (only anonymous visitors will see this section) then use the following shortcode (can be useful if you only want to show a message to the anonymous users):

[emember_protected scope="not_logged_in_users_only"]

Whatever content goes here is only visible to a non-logged in user (anonymous visitors of your site will see this message).

[/emember_protected]

Section Protection for Expired Members Only

If you want to just protect a section of a page for expired members (only expired members will see the message) then use the following shortcode:

[emember_protected scope="expired"]

Only the expired members will be able to see this message.

[/emember_protected]

If you want to protect a section of a page for expired members of a particular level then use the following shortcode:

[emember_protected scope="expired" for="2"]

Only the expired members from membership level 2 will be able to see this message.

[/emember_protected]

Section Protection without the “Content is protected” Message

If you want to protect a section of a post or page without showing the “Content is protected” message to the non-logged in users then use the following shortcode (can be useful if you don’t even want them to know that there is a section of content there):

[emember_protected for="2-3-4" do_not_show_restricted_msg="1"]

Whatever content goes here is only visible to members who belong to the specific membership level specified above. Also, the users who do not have access to this content won't see a "Content is protected" message.

[/emember_protected]

Section Protection without the Protected or Expired Message

The following section protection option protects the section without showing the “Content is protected” or “Account is expired” message (useful if you don’t even want them to know that there is a section of content there):

[emember_protected for="2-3-4" do_not_show_restricted_msg="1" do_not_show_expired_msg="1"]

Whatever content goes here is only visible to members who belong to the specific membership level specified above. Users who do not have access to this content won't see a "Content is protected" message. The expired members won't see the "Account is expired" message.

[/emember_protected]

Section Protection Not For Specific Membership Level

If you want to protect a section and make it NOT visible to a particular membership level then use the following shortcode:

[emember_protected not_for="1" do_not_show_restricted_msg="1"]

Whatever content goes here is NOT visible to members of membership level 1. All the other members can see this content.

[/emember_protected]

Using a Custom Message for the Non Members

This section protection shortcode can take another extra optional argument which can help you customize the text/message that is shown to non members.

Here is an example usage:

[emember_protected for="2-3-4" custom_msg='This is a custom message']

The content goes here. this content will be hidden and only available to members of membership level 2, 3 or 4.

[/emember_protected]

The following screenshot shows how this custom message is shown:

Section Protection Custom Message with HTML Link

You can use a HTML link in the custom message that you specify for the section protection shortcode. Remember to switch to the “Text” mode in the WordPress post/page editor if you are typing in HTML link code.

Here is an example shortcode usage:

[emember_protected for="2-3-4" custom_msg='This is a <a href="http://www.example.com">test link</a>']

The content goes here. this content will be hidden and only available to members of membership level 2, 3 or 4.

[/emember_protected]

Note

Just remember that when you want to use section protection on a post or page you should not protect the full post or the category that the post belongs to. When you apply category protection for a category, all the posts in that category is fully protected (category protection overrides all the small section protections in the post).

Section Protection in Action

You can see an example of how the section content protection work on the eMember demo site.

Filed Under: Content Protection, Design & Usage Tagged With: create teaser content, membership protection, partial content protection, protect section of a page, section protection, WP eMember

How to Get a List of Email Addresses of Your Members

Occasionally, you may require a list of email addresses belonging to your members for the purpose of sending bulk emails such as offers and promotions. WP eMember plugin facilitates this task by allowing you to obtain a comma-separated email list, which can be easily copied and pasted into your email campaign management software.

Step 1) Click on the “Members” menu from the “WP eMember” admin dashboard.

Step 2) Click on the “Member Lists” tab

Step 3) From this menu, you have the option to get the email list of all your members or for members from a particular membership level.

Filed Under: Design & Usage Tagged With: email list, WP eMember

How to Configure a Member’s Only Download Page

This post explains how you can give your members access to the Product Downloads when using the WP eMember plugin.

Table of Contents

  • 1) Simple File Download Option
  • 2) Using eMember’s Folder Protection Feature
  • 3) Using the Simple Download Monitor Plugin
  • 4) More Secure Download Option When Used with the WP eStore plugin
  • 5) Using Amazon S3 Download with WP eStore Plugin

1) Simple File Download Option

A “Members’s Only” download page is simply another page that contains a whole bunch of download links that the members can use to download the products. So all you have to do is create a page (example: “Member’s only download”) and put links to all the downloadable files on this page and then protect this page from the “Manage Content Protection” menu of the WP eMember plugin. Since the page is protected, only the members with correct membership level can access this page and download the file.

If you want to give access to a different set of downloadable files to your members based on their membership level (example: silver, gold, platinum) then you can create few different “Member’s only download” pages (one for each membership level) listing different downloadable files and protecting the pages accordingly.

View the Member’s Only Download Page on the demo site to see how this is done. Log in using the following details:

Username: free123
Password: testpass

2) Using eMember’s Folder Protection Feature

Note: The download folder protection feature requires the .htaccess functionality to work correctly on your web server. If you are unsure, please check with your hosting provider to confirm if your server supports .htaccess files.

You can also use eMember’s folder protection feature to secure your downloads. This makes it to where a member will always have to enter a username and password when he/she is about to download any file from this protected folder.

Go to the following WP eMember interface to configure download folder protection.

WP eMember -> Admin Functions -> Download Folder Protection

First you will need to enable the download folder protection feature. After that you can start uploading the files to this protected folder using the built-in file uploader.

emember-download-folder-protection-feature-settings

3) Using the Simple Download Monitor Plugin

You can use our free simple download monitor plugin to manage and configure your downloads. Then embed the download now buttons on a post/page that only the members can see. That plugin can also track the downloads from your members.

For added security, the plugin includes an enhanced file protection feature that can be integrated with our WP eMember plugin.

4) More Secure Download Option When Used with the WP eStore plugin

If you are using the WP eStore plugin then you can take this one step further. Instead of giving out the links to your products (eg. PDF file, Zip file, MP3 file) directly on the “Member’s Only Downlaod” page you can put a “Download” button that lets the user download a particular product. Whats the advantage? The member can download the product without knowing the actual location of the downloadable file (so the static URL of the file is always hidden).

How to create a “Download” button using the eStore?

Configure the products in WP eStore then use the following shortcode for each downloadable product on the page:

[wp_eStore_download_now_button id=1]

1 is the Product ID of the product in this example.

You can customize the download button text using the “button_text” parameter in the shortcode. Example shortcode usage below:

[wp_eStore_download_now_button id=1 button_text="Custom Download Text"]

5) Using Amazon S3 Download with WP eStore Plugin

You can also use amazon s3 integration with eStore’s secure download now button. Read the Amazon S3 secure downloads for members page for details.

Storing the files on amazon S3 and then using API to access those files offers a very good solution for protecting static files.

Filed Under: Design & Usage Tagged With: member only download, membership protection, WordPress membership

WP eMember and WP eStore Integration for Membership Payment

The eStore and eMember plugins are pre-integrated so using a WP eStore button to accept payment for membership is very easy.

The only thing you need to do is specify the “Membership Level ID” in the eStore product’s “Reference Text” field when you create/configure a product in eStore.

This basically tells eStore which membership level a product corresponds to. You can create as many eStore products and payment buttons as you want for your different membership levels.

Here is a summary of the steps involved

Step 1) Create an eStore product. Our WP eStore documentation will show you how to do this if you don’t know it already (there are video tutorials for it too)

Step 2) Find a field called “Reference Text” when your are creating/configuring the eStore product. You can find this field under the “Additional Product Details” section of the product (see the screenshot below).

Specify the membership level ID in this reference text field.

Check the video tutorial from the “Video Tutorial” section below which will explain how this works in details.

Video Tutorial

Click on the following image to open the video tutorial:

WP eMember Premium Membership

Buy Now Type Button or Subscription Type Button?

Read the following documentation if you are not sure if you should use an ONE OFF payment button or a SUBSCRIPTION (recurring payment) button for your membership payment:

  • Difference between “Buy Now” and “Subscription” type buttons for membership payment

Example Scenario

Here is an example scenario,

You have a membership level called “Gold Pass”. The id of this membership level is 3 (The ID for each membership level is listed on the Manage Levels screen).

Say for example, you want to charge $25 for this membership level. Go to the “Add/Edit Products” menu of the WP eStore plugin so you can configure a payment button to accept payment from potential customers.

When you fill in the details of this eStore product, just specify 3 (Membership Level ID of Gold Pass) in the “Reference Text” field which is under the “Additional Product Details” section. Now, use an eStore shortcode to place “Add to Cart” or “Buy Now” button (for the product you just configured) on your Membership Payment/Join Us page.

When a member pays for the membership using this button the eStore plugin will know (from the Level ID you entered in the reference text) that this payment was for a “Gold Pass” and it will automatically create the appropriate member account and send an email to the customer.

The email sent to the customers will contain a unique link. When they click/follow that link, they will be brought to the registration page where they will be able to choose their Username and password to complete the registration and access the “members only” content.

If you have multiple membership levels then create an “Add to Cart” or “Buy Now” button for each membership level and place them on your Membership Payment/Join Us page following the above instructions.

Integration Troubleshooting

Check the following link if your integration is not working as expected:

  • WP eStore and eMember integration troubleshooting

Filed Under: Design & Usage, Integration Tagged With: Integration, WP eMember

  • « Previous Page
  • 1
  • 2
  • 3
  • 4
  • Next Page »

Get the WP eMember Plugin

Get WP eMember

Categories

  • Additional Resources
  • Content Protection
  • Design & Usage
  • eMember Addon
  • Installation
  • Integration
  • License
  • Testing
  • Uncategorized
  • Video Tutorial

Recent Comments

  • Chris Brown on API – Querying A Member Profile Using HTTP GET or POST
  • admin on API – Updating A Member Account Using HTTP GET or POST
  • Chris Brown on API – Updating A Member Account Using HTTP GET or POST
  • admin on API – Updating A Member Account Using HTTP GET or POST
  • Andrea on API – Updating A Member Account Using HTTP GET or POST

Featured WordPress Plugins

WP Express Checkout Plugin
wordpress_estore_icon
wordpress membership plugin icon
wordpress_affiliate_plugin_icon

Copyright © 2025 | WP Membership Plugin