When you first install the WP eMember plugin, it will create all the mandatory pages for you so you never need to use the following tutorial.
However, if you need to re-create those pages (for whatever reason) then just watch the following video and it will show you what to do:
Pages Created on Installation
When you install the WP eMember plugin for the very first time, the following pages are automatically created:
- Login Page – The page where visitors are able to login to your site.
- Registration Page – Where customers will sign up to your website. A form where they will enter in their details.
- Join Us Page – A page that has the different memberships that you offer.
- Edit Profile Page – Where your members can go to edit their profile.
- Password Reset Page – Where your members can go and reset their account password.
Recreating the Mandatory eMember Pages
If you happen to accidentally delete any of the required pages (the four pages listed above), you can complete the steps below to recreate the page(s).
Login Page
Creating the Page:
- Create a new WordPress page and title it ‘Member Login’.
- In the page editor enter in the following shortcode and then publish the page:
[wp_eMember_login]
Correcting the URL:
- Copy the URL of the new ‘Member Login’ page.
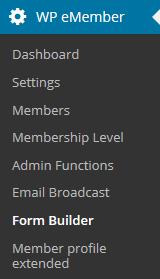
- Click on the ‘WP eMember’, ‘Settings’ menu.
- Click on the ‘Pages/Forms Settings’ tab.
- Delete the previous ‘Login Page’ URL and paste in the new URL.
- Ensure you ‘Update Options’.
Registration Page
Creating the Page:
- Create a new WordPress page and title it ‘Registration’.
- In the page editor enter in the following shortcode and then publish the page:
[wp_eMember_registration]
Correcting the URL:
- Copy the URL of the new ‘Registration’ page.
- Click on the ‘WP eMember’, ‘Settings’ menu.
- Click on the ‘Pages/Forms Settings’ tab.
- Delete the previous ‘Registration Page’ URL and paste in the new URL.
- Ensure you ‘Update Options’.
Join Us Page
Creating the Page:
- Create a new WordPress page and title it ‘Join Us’.
- This page can be customized how you would like. Use the ‘Join Us’ page to inform your customers of the different memberships that you offer. Once you have added content to the page, ensure that you ‘Publish’
Correcting the URL:
- Copy the URL of the new ‘Join Us’ page.
- Click on the ‘WP eMember’, ‘Settings’ menu.
- Click on the ‘Pages/Forms Settings’ tab.
- Delete the previous ‘Membership Payment/Join Page’ URL and paste in the new URL.
- Ensure you ‘Update Options’.
Edit Profile Page
Creating the Page:
- Create a new WordPress page and title it ‘Edit Profile’.
- In the page editor enter in the following shortcode and then publish the page:
[wp_eMember_edit_profile]
Correcting the URL:
- Copy the URL of the new ‘Edit Profile’ page.
- Click on the ‘WP eMember’, ‘Settings’ menu.
- Click on the ‘Pages/Forms Settings’ tab.
- Delete the previous ‘Member Profile Edit Page’ URL and paste in the new URL.
- Ensure you ‘Update Options’.
Password Reset Page
Creating the Page:
- Create a new WordPress page and title it ‘Password Reset’.
- In the page editor enter in the following shortcode and then publish the page:
[wp_eMember_password_reset]
Correcting the URL:
- Copy the URL of the new ‘Password Reset’ page.
- Click on the ‘WP eMember’, ‘Settings’ menu.
- Click on the ‘Pages/Forms Settings’ tab.
- Delete the previous ‘Password Reset Page’ URL and paste in the new URL value.
- Ensure you ‘Update Options’.